
How to Level Billiard Table Slate: Shimming, Seam Alignment and a Dead-Flat Bed
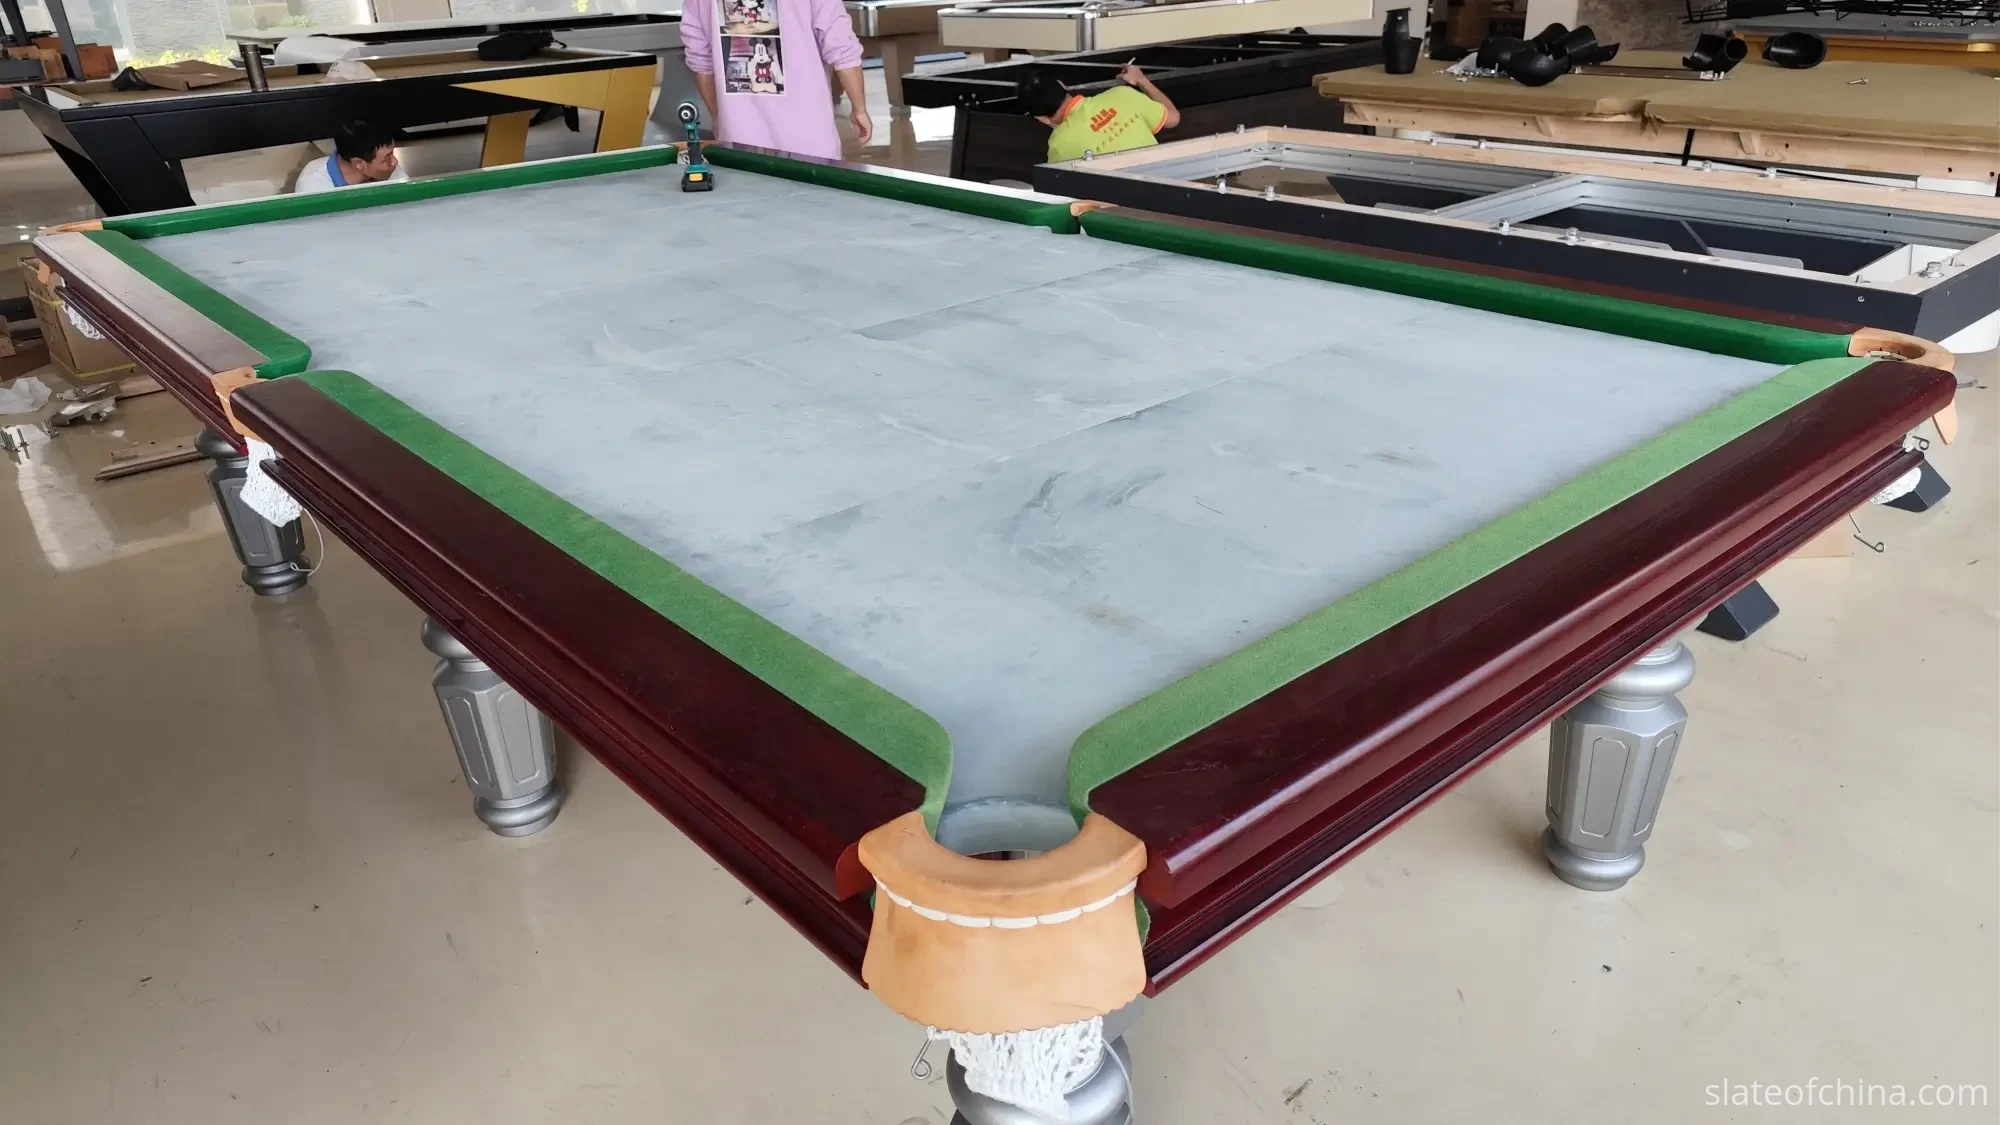
Set a billiard ball on the bare slate, a few centimetres from one of the two seams. Don't strike it. Just place it, and let go.
On a well-installed table, the ball stays where you put it. If it starts to move, the table may have a slope — or a local surface irregularity worth a closer look. Now roll it slowly — a gentle push, about the speed a ball has on its last stretch to a pocket — straight across the seam. A change in its line there may point to a height difference at the joint, or to another surface problem nearby. Two questions, one ball, and a useful first look at the installation in about twenty seconds.
A first look is exactly what those tests are. A ball can suggest a problem; it never settles one. The instruments do that — a precision level reads the table's orientation against gravity, while a straightedge and feeler gauges find local deviations and seam steps. This guide uses all three, each where it belongs in the sequence, and the rule it keeps is simple: a reading before an adjustment, every time.
We spend our days in Jiujiang machining three-piece slate sets that leave the factory matched, verified and flat. But the surface a ball actually rolls on is decided later — on your assembly floor or in the club room — by a frame, a set of supports, a handful of shims and whoever is holding the straightedge. This guide is about that work: how to level billiard table slate, how to align three-piece slate seams, where pool table slate shims belong, and where they never do.
It is written for table manufacturers' assembly teams, installers and service technicians, and for buyers who want to know what a good installation should look like. Getting the panels to the frame without damage is covered in how to handle and move billiard slate; verifying the stone on arrival is covered in the incoming flatness inspection guide; and the full assembly sequence, frame to cloth, has its own page in the billiard slate installation guide. This one stays with the leveling itself — the part of the job that decides whether three pieces of stone behave as one playing surface.
Quick answer: leveling billiard table slate means answering two different questions, with different tools, in a fixed order.
| The question | The tool that answers it | Where the correction belongs |
|---|---|---|
| Is the table level? Orientation against gravity | A long precision level | Legs, leg levelers, frame adjusters |
| Is the surface flat? Geometry, including the seams | A straightedge, feeler gauges, a slow ball | Panel seating, support points, shims at approved places |
Level is about gravity; flat is about geometry. Correct the frame before you touch the panels, the supports before you touch the seams — and never ask a shim to do a frame's job.
The Two Questions a Ball Asks
Most leveling problems start as vocabulary problems. "The table isn't level" is how every complaint sounds, whether the bed is tilted, one panel sits high, or a seam has a lip on it. The words matter, because the three faults are corrected in three different places.
A level bed is honest to gravity: it leans no direction, so a ball at rest stays where it was put. A flat bed is honest to geometry: no local rise, no local dip, no step where two panels meet. The two are independent. A bed can be level from end to end and still play crooked, because a gentle swell in the middle says nothing to a level that happens to be standing on it. And a beautifully flat bed set down on a sloping floor will roll balls downhill all evening while passing every geometry check in the book.
That is why a professional installation runs both tests and keeps them separate. The level asks about gravity. The straightedge asks about geometry. The ball asks about both and forgives neither — it does not read the bubble, it reads the stone. How little it takes before a roll visibly bends, and why flatness matters to the game at all, is covered in how slate flatness affects ball roll. The measurement side — what a flatness tolerance means, how it is expressed and how the stone is checked against it before packing — has its own home in the billiard slate flatness guide; this page keeps its feet on the table frame.
Before anyone touches the table, assemble the small kit that answers the two questions honestly:
| What you hold | What it tells you | What it does not tell you |
|---|---|---|
| A precision level — the longest you can practically use | The orientation of the bed under it, against gravity | Anything about local highs and lows between its ends |
| A straightedge — the longest you can carry into the room | Local geometry: ridges, dips, steps across the seams | Whether the table leans |
| Feeler gauges | The size of the gap under the straightedge, in numbers you can write down | What caused the gap |
| Shims, or the adjustment hardware the table maker specifies | Placement corrections at support points | Repairs — a shim moves a panel; it does not straighten stone |
| The table manufacturer's installation sheet | Where supports, fasteners and adjustment points are designed to be | Tolerances — if the sheet does not state them, ask |
| A notebook and a marker | Readings, positions and marks that make the work repeatable | Nothing — but only if you actually write in it |
A short household level deserves a warning of its own: it flatters whatever thirty centimetres it happens to be standing on. On a nearly three-metre bed, a short level is an instrument for producing confidence, not information.
With the kit assembled, a full leveling job runs in a fixed sequence. The short version, for the toolbox wall:
| Step | Check | Action |
|---|---|---|
| 1 | Floor, legs and frame | Clear out structural looseness and overall tilt first |
| 2 | Slate support surfaces | Clean away debris; confirm the supports are present and sound |
| 3 | Three-panel placement | Confirm each panel's orientation, position and full seating |
| 4 | Overall level | Measure with a long precision level; correct at legs and frame |
| 5 | Support points and seams | Adjust supports or place shims where the table design allows |
| 6 | Overall flatness | Work the straightedge and feeler gauges across multiple positions |
| 7 | Fastening and re-check | Fasten per the manufacturer's method, then re-check level and seams |
| 8 | Seam filling and cloth | Proceed only after the bed has passed |
What the Frame Owes the Slate
Slate does not argue with a frame. It copies one. Lay a flat panel on a twisted frame and you get a twisted bed with flat stones in it, and the straightedge will find the frame's story written into the surface. Before the first panel goes down, the frame has to earn it.
Work through the structure from the floor up. Legs on solid footing, not propped on whatever was nearest the door. Frame joints tight. Crossmembers present, unbowed and fastened where the design says they should be. A commercial table carries a heavy slate load in one spot for years, on a floor that people walk past all day — and plenty of club floors are wood over joists, which moves. Where a floor cannot be trusted, the table's levelers and adjusters are the honest answer, not a folded carpet corner.
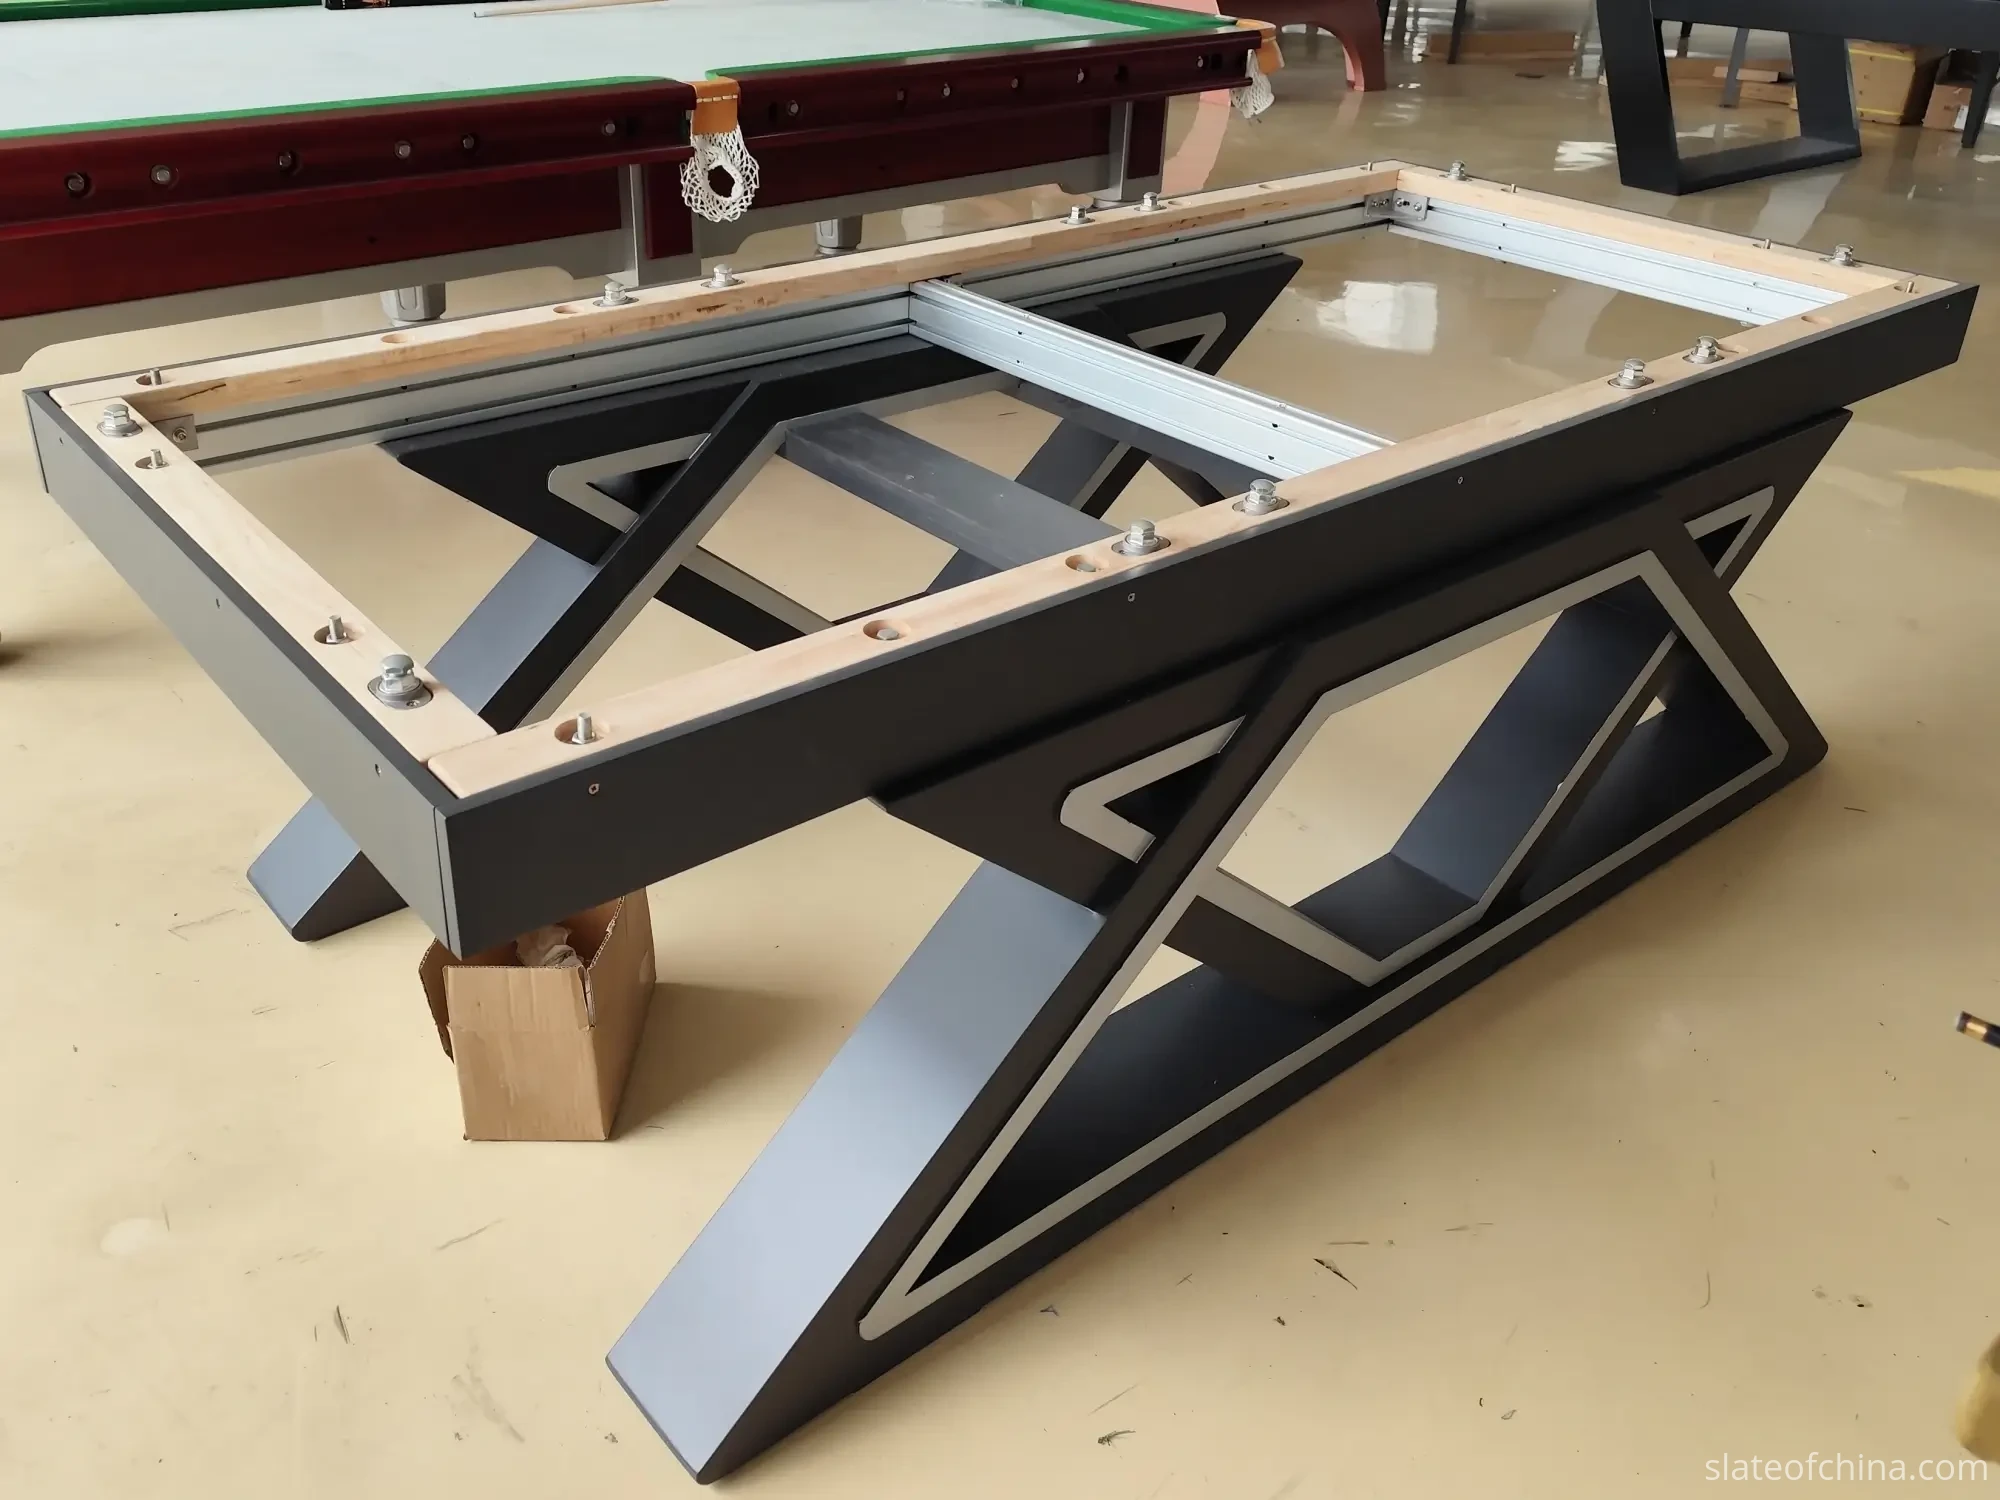
Then rock it. Lean a hand on each corner of the empty frame in turn. Movement you can feel is movement a rolling ball will eventually find. Track down the loose leg or the sagging joint now, while the frame is light and the answer is a wrench rather than a shim.
There is a hierarchy worth holding onto for the rest of this guide: floor, legs, frame, crossmembers, panel seating, shims — corrections belong to the layer that owns the error. A frame problem "solved" with a shim under the slate is not solved. It is hidden, and it stays hidden only as long as the stone agrees to keep the secret.
Three Panels Down, in Their Right Places
With the frame square, tight and roughly level, the set comes out of its packing and goes on — in the right order, in the right orientation. It sounds too obvious to write down, and it goes wrong anyway: the head panel at the foot end, a centre panel flipped, one order's panels mixed with another's on a busy day.
A matched set is exactly that. The joint faces are machined and the set is matched before packing, so the pieces meet flush in their intended positions (slate joint alignment). Factory markings — or the marks you make yourself when dismantling an existing table — are not decoration; they are geometry. Two good panels in swapped positions can produce one visible joint. Why the bed is split into pieces at all is a question of handling and cost, covered in one-piece vs three-piece slate for manufacturers.
Before each panel lands, clean what it lands on: the frame bed, the crossmembers, and the underside of the panel itself. The most common cause of a rocking panel is not the panel. It is a wood trimming, a stray bolt or a pebble of grit sitting between stone and frame where nobody will ever see it again.
Set each panel down — the last centimetre should never be a drop — and test it before fastening anything: press each corner in turn. A panel that rocks on its supports is describing a problem you can fix in seconds now, or chase for an hour later with a straightedge. The lifting technique that gets panels onto the frame intact has its own page — the slate handling guide — and the same discipline applies to five-piece snooker beds: identical sequence, more seams to please.
First Question First: Level the Table, Not the Slate
With the panels resting in place, gravity gets asked first. Lay the level along the length, across the width, over each panel, and near both ends. Don't trust one reading taken at the centre of the table — a bed can sit level at its middle and lean at both ends.
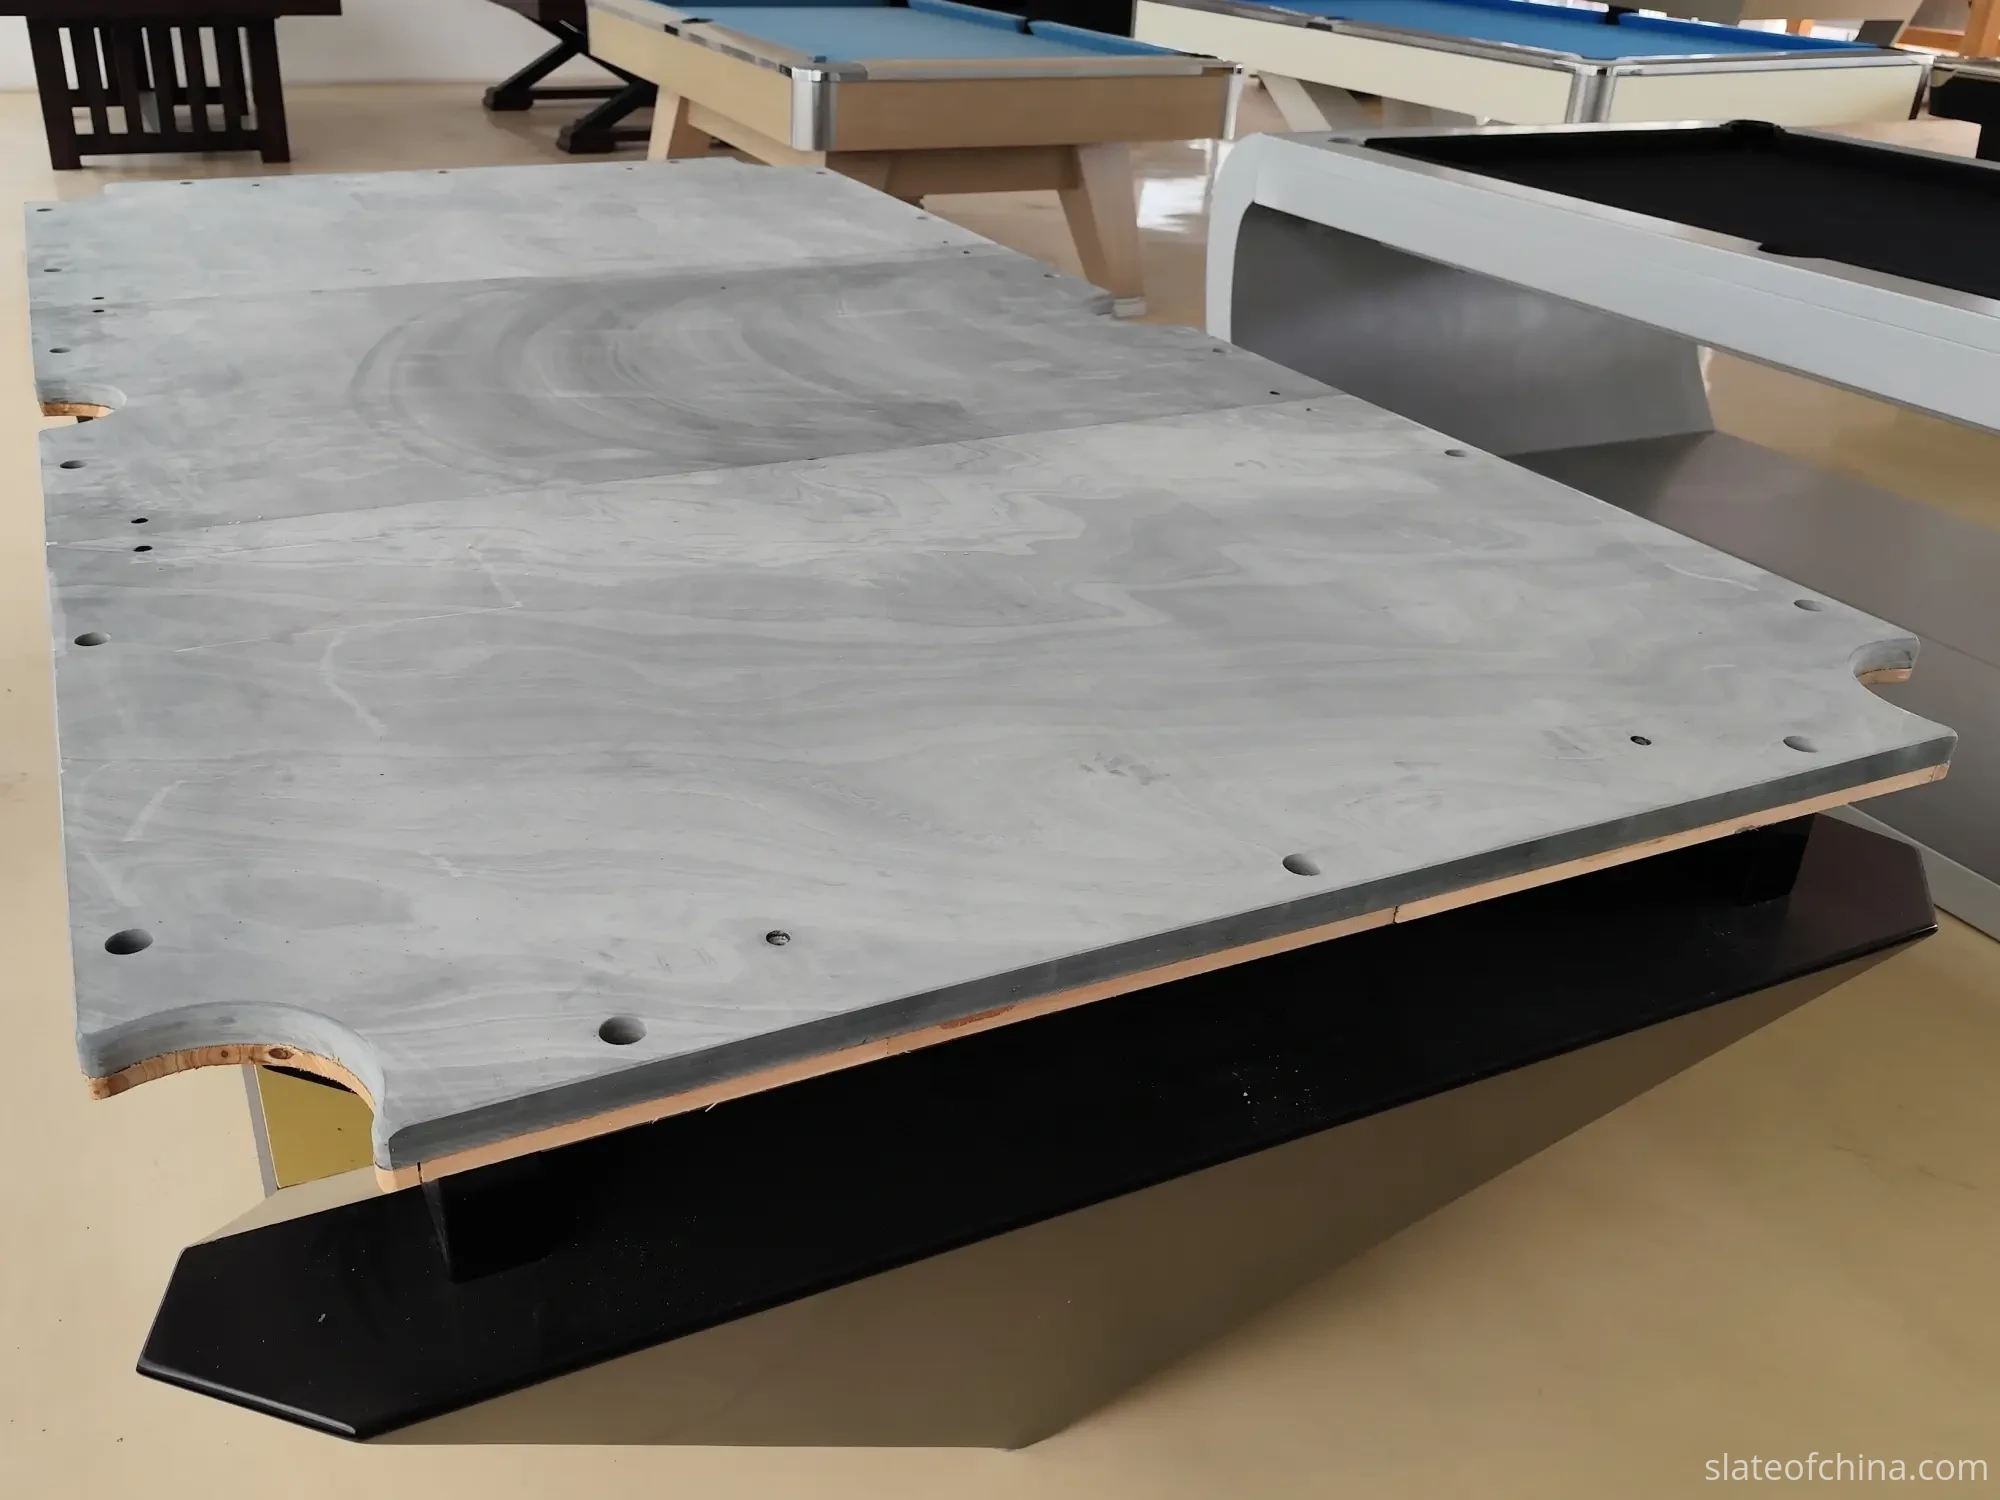
All coarse corrections happen at the legs and frame adjusters, never by lifting or wedging the slate. Turn a leveler a little, then re-measure. The four corners of a table are in conversation with each other; lift one and the other three change their story. Small turns, repeated measurement, patience.
If you are learning how to level a pool table slate for the first time, resist the urge to make it perfect in this pass. Get the frame honest — close enough that no correction at the panels will have to fight the overall tilt. The fine work comes next, at the supports and the seams. And one habit from people who do this weekly: write your readings down. The difference between a good installation and a lucky one is usually a notebook.
Shims: Placement Work, Not Repair Work
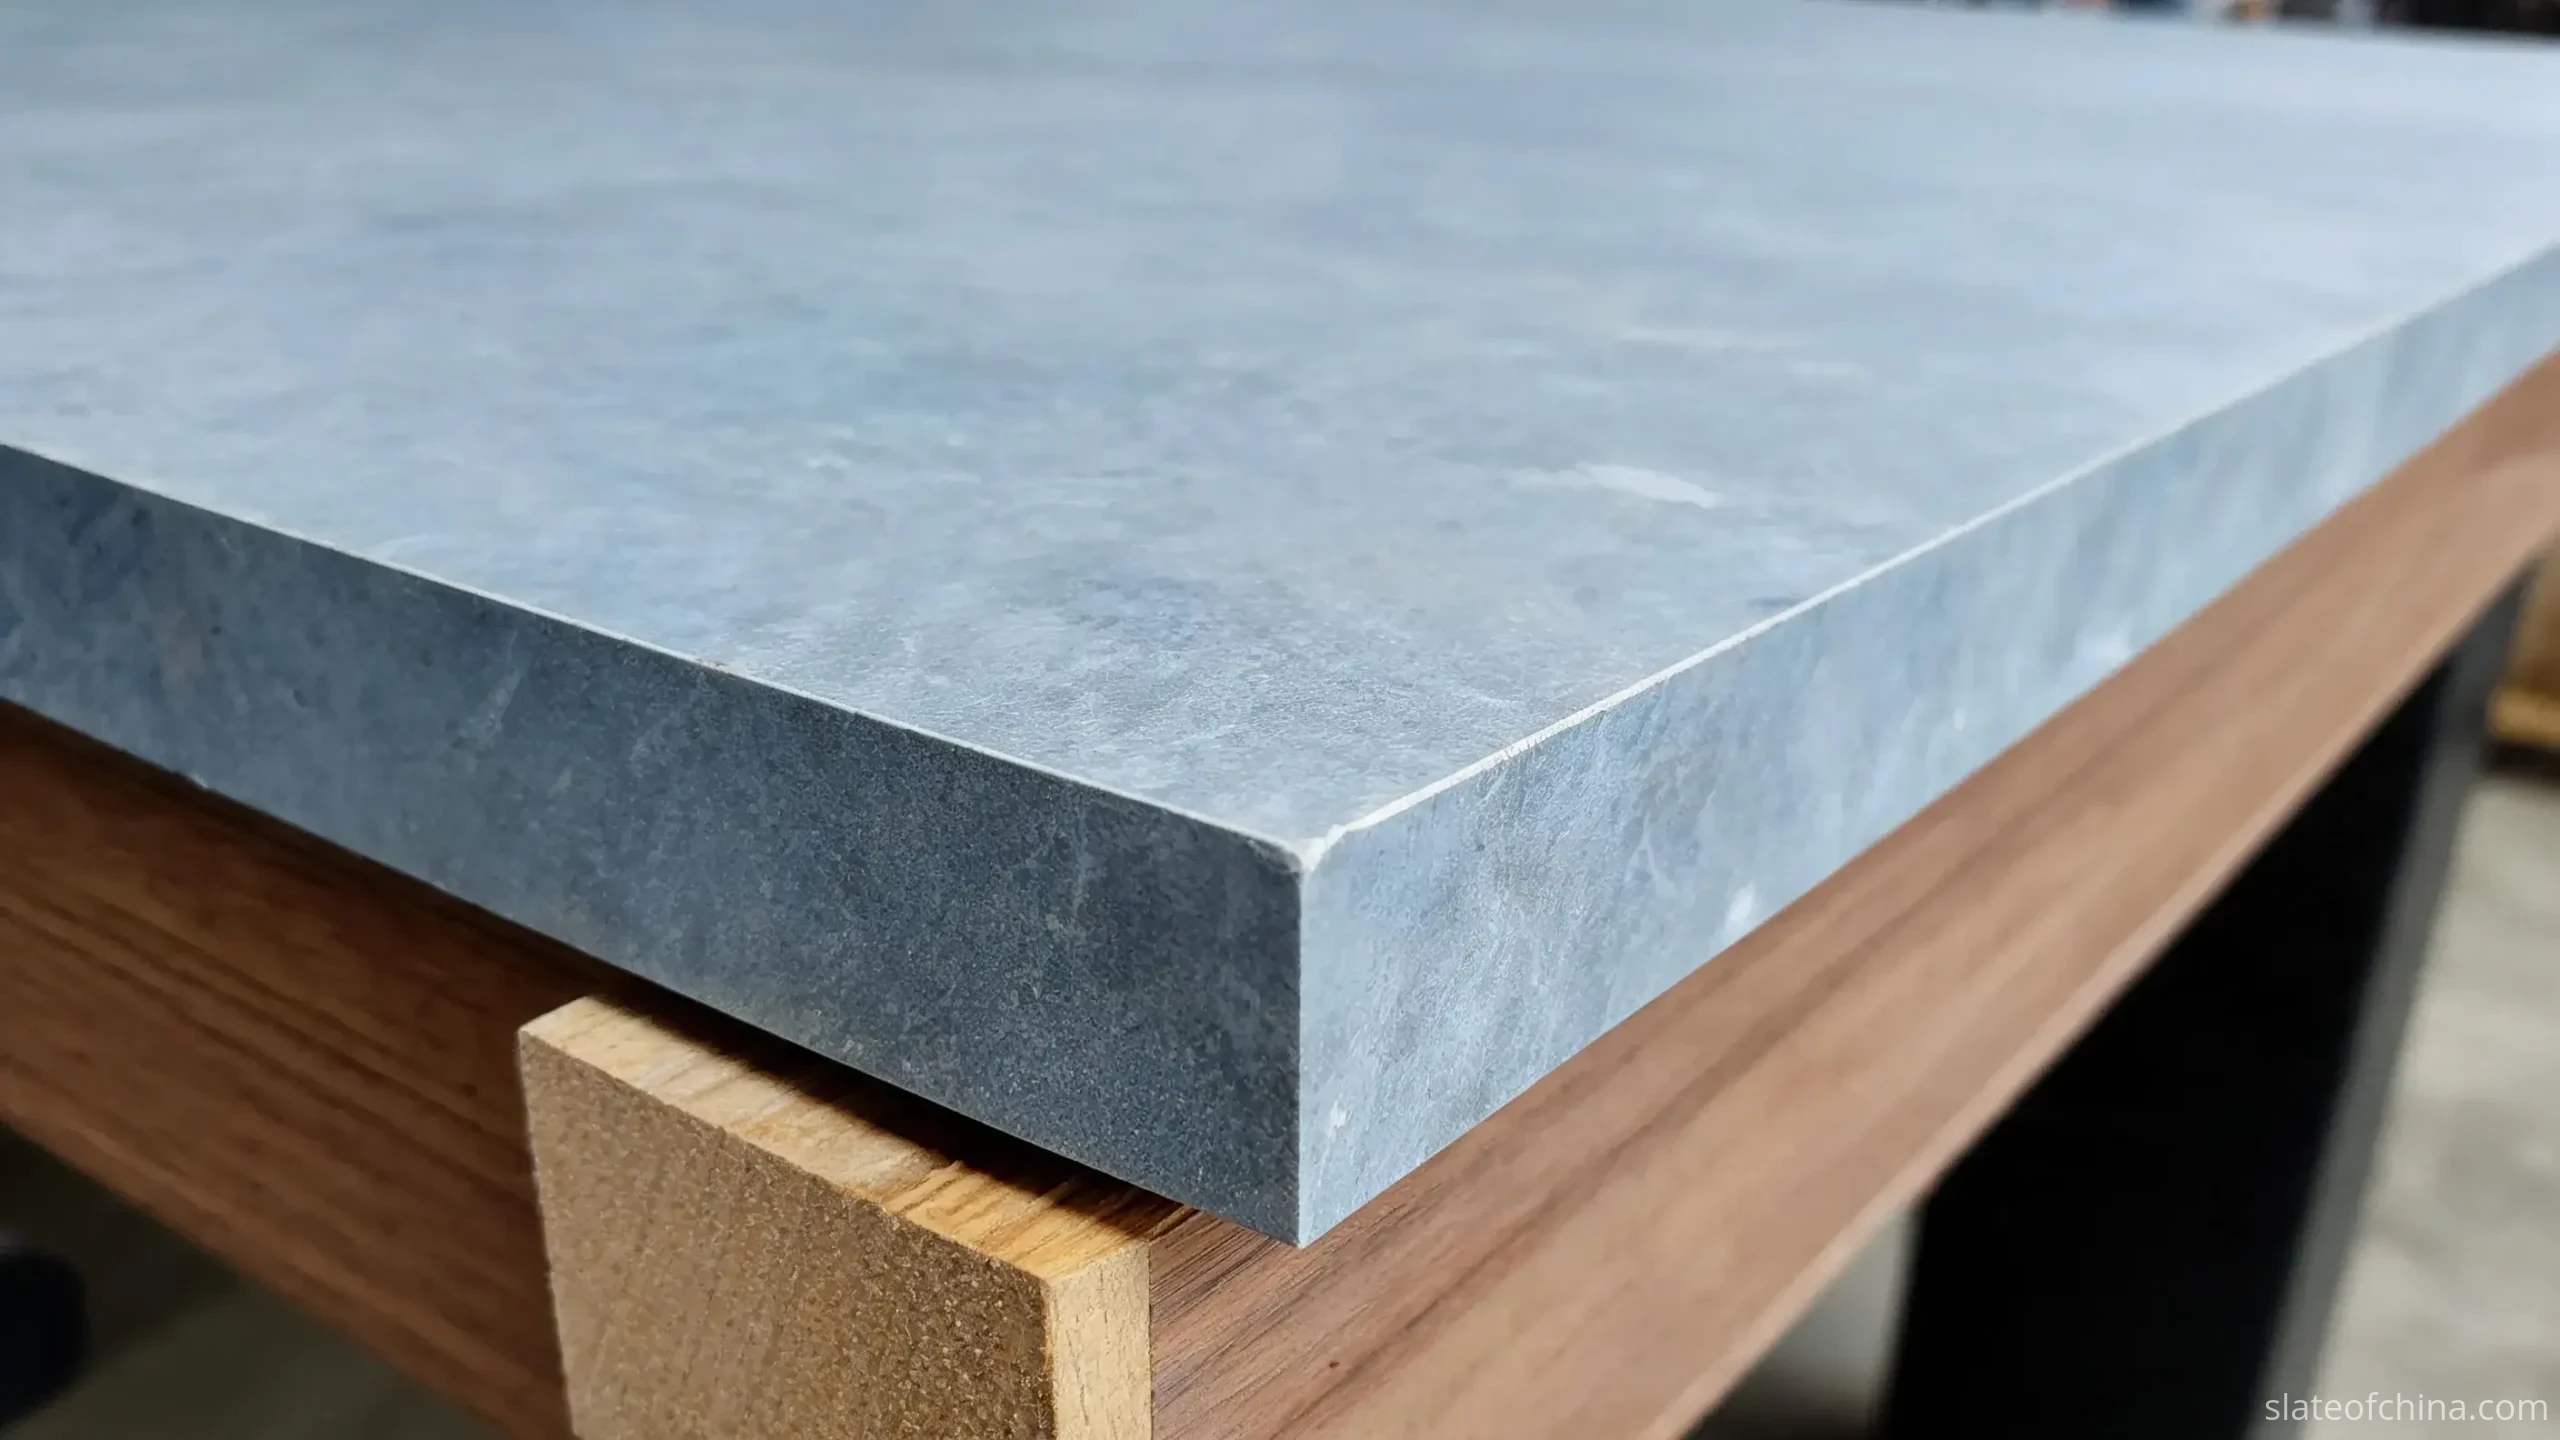
Now the second question, and the tool with the worst reputation in the trade. A shim is a thin wedge or strip — wood, plastic or metal — used to make a small, controlled height adjustment where the table's design allows one. Used properly, it is placement work, and precise. Used carelessly, it is the reason so many beds rock.
The rule that keeps shims out of trouble: a shim belongs at a support point or an approved adjustment location, never under an unsupported span of stone. A shim under a crossmember bearing is a placement decision. The same shim slid under the middle of a panel's free edge is a fulcrum you have just built — the panel no longer rests on the supports it was designed for, it rests on your improvisation, and the straightedge will report the difference. A shim in the wrong place does not support a panel; it redefines where the panel bends.
Before any shim goes in, find out what the height difference actually is. The usual suspects, in the order worth checking them: a frame or leg still out of adjustment; a support point sitting low; a panel not fully seated; debris under the stone; a genuine local irregularity in the panel; a height step between two panels. Only one of those six is cured by a shim, and it is rarely the first one anyone suspects.
Shim material and placement depend on the table's support design. Use the adjustment method and materials specified by the table manufacturer wherever possible — a material that works well on one frame may be unsuitable for another, particularly where concentrated loads or long-term compression are a concern. With that caution in place, the general picture across installer practice:
| Shim material | How it behaves | The honest verdict |
|---|---|---|
| Hardwood strips and shingles | Dimensionally stable when dry, snug and laid flat to the load | The workshop default. Keep them dry, flat and fully bearing |
| Non-compressible plastic leveling shims | Immune to humidity; stacks in fine, repeatable steps | Good where the table design or manufacturer specifies them |
| Thin steel shims | No compression, no creep at all | For the finest corrections; sharp edges, handled accordingly |
| What to avoid | Cardboard, folded paper, foam offcuts, loose stacks of anything soft | They compress, they creep, and the bed you leveled in October is a different bed by March |
Whatever the material, a shim has to stay put and stay the same thickness under years of load. And do not drive a thick taper in hard to "take up the slack" — forcing stone upward onto a wedge point is how good beds acquire their first crack around a support. Many frames provide leveling screws or pads at the slate supports for exactly this reason, so that stone never has to be persuaded.
The working procedure, in short:
- Locate the deviation with the level or straightedge — at the trouble spot first, then at the neighbouring supports, because a bed is a system.
- Diagnose the cause from the six suspects above before touching anything.
- Correct at the highest layer that owns the error: legs before frame, frame before supports, supports before shims.
- Add the shim at the support point in the smallest step that changes the reading.
- Recheck locally and across both seams — expect to repeat small steps rather than correct in one heroic move.
And the question that has to be asked honestly: can shims fix warped billiard slate? No. A shim moves a panel relative to its supports; it does not bend stone. If a panel shows the same deviation while seated on a verified frame with clean supports, the fault is in the slab, not the seating, and no arrangement of wedges will improve it. That is the moment to stop leveling and start measuring — the method for that conversation is in the incoming flatness inspection guide — and if a panel truly has to leave the table, a matched replacement can be made from the old slate's dimensions (replacement slate for existing billiard tables).
The Seams: Where Three Panels Become One Bed
Each panel can pass its own checks and the bed can still fail — at the seams. Three-piece slate leveling is won or lost along the two joint lines, because the ball does not care that three stones are each nearly perfect. It cares about the lines where they meet.
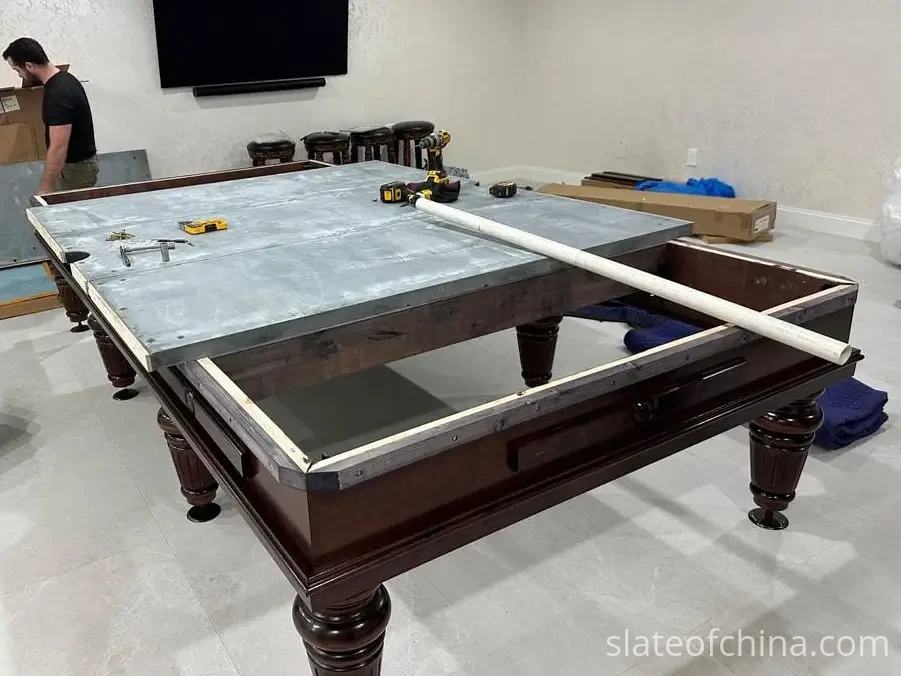
Lay the straightedge across each seam so it rests on both panels, and work along the line: near both ends, at the middle, and at any point where a slow ball has stumbled. There are three tell-tales to look for: the straightedge rocks over a ridge; light shows under one end across a step; the gap under the edge varies from one position to the next. Feeler gauges put numbers on what the eye finds. And for a check that needs no tools at all, drag a fingernail across the joint — a step the nail can catch is a step a slow ball will feel. The cloth will hide that line from your eyes. It will not hide it from the game.
Here the set earns what you paid for it. On a correctly matched three-piece set, the joint faces are machined square and the set is matched before packing, so the panels are intended to meet flush in their intended positions — how those edges are worked is covered in slate edge and joint machining. So when a step appears at a seam, work from underneath first: panel orientation, support heights, seating, debris. In our experience, that is where most steps are settled — but it is a starting order, not a verdict. If the height difference survives those checks, stop and inspect the joint faces and panel edges for transport damage, chipping or dimensional deviations before deciding on a correction. Machined geometry does not wander on its own; a mishandled panel is another story, and a close look at the edges will tell you which one you are dealing with.
What you never do is push packing, filler or "just something thin" into the joint gap to take up a height difference. Material driven into the gap repairs nothing — it jacks the panels apart and converts a seating problem into a seam problem. Joint filling is a finishing step for a joint that has already passed, not a correction for one that hasn't.
Second Question, Full Sweep: The Straightedge Pass
With both seams honest and the frame level, the whole bed earns one systematic pass — because level panels and flush seams still do not guarantee a flat assembled surface. Support conditions, fastening and handling all leave small marks, and the straightedge is how you find them while they are still cheap.
Work the edge like a survey: along the full length on both sides of each seam; across the width at several stations; corner to corner on the diagonals where your edge allows; and carefully around the pocket zones, where machined openings and measuring meet. At each position, look for light under the edge and for rocking. Where you find a gap, gauge it, note its position, and keep moving — then read the collection of readings before adjusting anything. A low spot beside a high spot is a different animal from a low spot alone.
Two habits separate a professional pass from a casual one. First, raking light: switch off the overheads and light the surface at a low angle, and deviations cast shadows that measurements can miss. Second, records: write down what you found, and where. Two years from now — after a house move, a re-cloth, a flood — the next person to check this bed inherits your notes instead of starting from zero.
Where do the readings go? Into the tolerance agreed for the job — the table manufacturer's specification, or the acceptance criteria a slate buyer sets with the supplier before the order. A number without a measuring method behind it is not a specification; it is a wish. As for the flatness itself: on our side it is created before the set is ever cut into three, on the grinding bed, as one plate — the only honest way to grind a bed that has to behave as one surface (how slate is ground flat). Installation does not create that flatness. Its entire job is to not lose it.
Screws Seat the Slate; They Do Not Level It
The panels are level and the seams are flush. Now the mounting screws go in, and the last classic mistake becomes available. Mounting hardware has one job: to hold each panel on the supports it was so carefully placed on. The moment a screw is used to drag a panel down onto a support it isn't touching, the fastener stops being a clamp and becomes a jack — and stone does not negotiate with jacks. The familiar result, sooner or later, is a crack radiating out of a countersink that was asked to do structural work.
Fasten according to the table design: the specified screws, in the machined holes, seated into their countersinks, snugged in an even sequence rather than torqued hard at one corner first. Why those holes and countersinks are where they are is covered in CNC drilling and mounting holes. What matters at the bench is simpler: if the panel has to be pulled, it isn't seated. Re-seat it.
Then re-check. Fastening changes seating, and seating changes seams. If the straightedge says a seam grew a step while the screws went in, back the fasteners off and fix the seating — don't tighten your way past the reading and hope the cloth hides it.
The Ball Test, Before Any Filler and Cloth
Every instrument has been through the bed now. One witness remains — the one that will be consulted every day for the next decade.

Roll a ball slowly — dying-shot speed — along each seam, across each seam at several positions, down the long centre lines, and along the diagonals. Watch its line, not its pace. A bed that is dead flat lets a slow ball finish its roll as if guided; a bed with a hidden ridge tells on itself at the seam; a bed with a soft patch confesses in a gentle bend. What you accept here is the final word on the work — the instruments have already had their say. The gauges and the notebook are how you defend it. The ball is how the table will be judged.
Only when the bed passes does seam filling begin — and filling, dressing and finishing the joints is a craft of its own, with its own materials and methods. The order is the whole point: filler finishes a joint that has already passed; it never creates one. Filler packed into a misaligned gap does not level the bed — it preserves the misalignment under a smooth skin. Then the cloth goes on, and a final touch-up can still be made at the leg adjusters. What cannot be made under the cloth is any correction to the slate itself — which is why none of them was postponed.
When the Table Still Plays Wrong
Sometimes the bed passes every check and the game still says no. The table below is the short version of the questions that reach us most often:
| What you see | Where to look first | What usually settles it |
|---|---|---|
| Table reads level, but slow balls drift | A local deviation or seam step the level cannot see | Straightedge pass; re-seat or re-shim at the supports |
| A ball stumbles crossing the middle | A ridge or step at a seam | Straightedge across the joint at several positions; correct at the supports |
| One end of the table plays consistently downhill | Overall tilt: legs, levelers, footing | Leg and frame adjustment — leave the slate alone |
| A panel rocks under hand pressure | Debris, a low crossmember, an unseated panel | Clean and re-seat before anything else |
| A seam went uneven after the screws went in | Fastening pulled a panel out of its seat | Back the screws off, re-seat, fasten evenly |
| The table played true for months, then drifted | The floor or frame settled — or the table was moved | Recheck frame and full bed; never move an assembled table by dragging it |
| A new set on an old frame plays wrong | Frame geometry, not the new stone | Verify the frame first; measure the panels before blaming them |
One caution before the slate gets convicted: a ball is a witness, not a verdict. Cloth tension, cushion rubber, humidity and temperature all have opinions about how a ball rolls. A serious diagnosis looks at the whole table system before it looks at any single component — and if the evidence finally does point at the stone, measure it properly before acting on the suspicion. The method is in the incoming flatness inspection guide.
Put the Tolerance in Writing Before the Slate Ships
Everything above is what a good installer does with a good set. But installers work with what arrives, and what arrives is decided weeks earlier, in the specification. If you source slate — as a table manufacturer, or as an importer with your own installation network — the most useful thing you can do for your installers is to put the geometry in writing before production.
Useful is not the same as vague. "Must be flat" is a hope. A workable specification separates the four measurements that hide behind that one word:
- Flatness of each individual panel — together with the instrument and method that will judge it
- Height relationship across the joints — how the set is matched, and how that match is verified before packing
- Flatness of the assembled bed — what the dry-assembled set is checked against at the factory
- Overall orientation of the installed table — which is an installation matter, not a stone matter, and the subject of this guide
Agree on the numbers, the method and who records them. On our side, the working data behind those figures is published on the billiard slate quality and test data page, and the nominal sizes, thicknesses and piece counts for each table type sit on the technical specifications page. Thickness, meanwhile, is a specification question of its own — what it changes and what it does not is covered in how slate thickness affects table performance. A set ordered against a written specification arrives with its geometry already defended, and the installation becomes what it should be: verification, not rework.
Keeping the Bed True
A level bed is not an achievement; it is a maintained condition. Floors creep with the seasons. Joists flex. Bolts relax. Commercial floors take delivery trolleys and cleaning machines. The bed you verified in October is not automatically the bed the club plays on next spring.
The maintenance is shorter than the installation. Keep the table's footing solid and unchanged. If the room's floor is suspect, check the level more often. Recheck the bed after any relocation, any building work nearby, or any heavy service on the table. And if the roll changes, run the seam and straightedge checks before anyone touches the cloth. If a table has to be moved, take nothing for granted — an assembled table dragged across a floor can twist the frame and crack the slate in one motion, which is why the moving procedure has its own page in the slate handling guide.
Flat, matched, verified — that is how the set leaves us in Jiujiang. Level, seated, shimmed honestly, fastened kindly, and checked with a level, a straightedge and one last slow ball — that is how it becomes a playing surface. A slate bed is made twice: once at the grinding bed, once on the table frame. The ball only ever signs off on the second one.
Frequently Asked Questions About Leveling Billiard Table Slate
How do you level a three-piece pool table slate?
Stabilize and level the table frame first, using the legs and frame adjusters. Then seat each panel cleanly on its supports, check that nothing rocks, and use shims only at approved support points to fine-tune the heights. Align both seams with a straightedge, fasten the panels gently, and finish with a full straightedge pass and a slow ball test before the seams are filled and the cloth goes on.
Where do shims go under billiard slate?
Only at support points or adjustment locations specified by the table design. Before adding a shim, check whether the real cause is the frame, a leg, an unseated panel or debris under the stone. Shims placed under unsupported spans of slate create point loads and fresh problems — they adjust placement, they do not repair geometry.
Can you level a pool table without removing the felt?
Partly. Leg and frame adjustments can be made with the cloth on, and often that is all a slightly drifted table needs. But seam alignment, seating corrections and anything involving the mounting hardware require access to the slate, which means stripping the cloth. If a slow ball still misbehaves after the leg adjustments, the table is usually asking for that access.
Why are the seams between the three slate pieces uneven?
Most often because of what is underneath: a support sitting low, a panel not fully seated, debris between stone and frame, or a frame that has settled or was never flat. On a matched set the joint faces left the factory flush, so a step at the seam usually points to the support conditions rather than the stone — unless a panel shows visible damage.
Can you level billiard table slate yourself?
With care, an experienced owner can run the checks and make leg-level adjustments. Full three-piece leveling is heavier work: the panels are far beyond a one-person lift, and errors in shimming or fastening can crack stone. Full-size tables, first installations, and any job involving a twisted frame or a suspect panel are better handled by a qualified installer.
Does thicker billiard slate stay level more easily?
Thickness adds stiffness and mass, but it does not manufacture flatness — a thick panel that was not ground flat stays not-flat. Leveling is decided by the surface geometry and the support conditions, not by the weight of the section. What thickness does affect is handling and how the table behaves in service, which is covered in our guide to how slate thickness affects table performance.
Can seam filler hide an uneven slate joint?
No. Filler and dressing finish a joint that has already passed the straightedge and ball checks — they smooth the last hairline and make the joint invisible under cloth. They cannot correct a height step, and filler packed into a misaligned gap tends to preserve the fault rather than remove it. Align the seam first; finish it afterwards.
Need billiard slate for your table design?
For OEM table production or replacement projects, share your table type, playing dimensions, slate thickness, piece configuration, machining drawing and the flatness tolerance your installers work to. We review the specification, machine the set, match it, and verify the assembled bed before it is packed — so the leveling on your floor starts from geometry you can trust.