
From Quarry to Roofing Slate: The Tile Journey
| Station | What Happens | Output | Time on Line |
|---|---|---|---|
| 01 Splitting | Block split into rough tiles along cleavage | Rough blanks, 5–8 mm | Most of a workday per block |
| 02 Dressing | Edges squared, surface checked | Dressed blanks | 2–3 minutes per tile |
| 03 Sizing | Cut to exact length and width | Finished dimensions | 1–2 minutes per tile |
| 04 Drying | Moisture driven off, tile stabilises | Dry, stable tiles | 24–72 hours |
| 05 Hole Punching | Nail holes punched or drilled | Fixable tiles | 30 seconds per tile |
| 06 Grading | Sorted by thickness, colour, grade | Graded batches | 1 minute per tile |
| 07 Inspection | 100% check: dimensions, surface, sound | Passed or rejected | 2 minutes per tile |
| 08 Crate Packing | Tiles stood upright in wooden crates | Export-ready crates | Half a day per container |
A block leaves the quarry weighing 15 to 30 tonnes. It arrives at the factory gate on the back of a front loader, chalk number still visible on its face, grade already assigned — R for roofing, B for billiard. For a roofing block, the journey from this moment to the inside of an export crate passes through eight work stations. This article tracks that journey station by station, the way a production controller would walk the line on any given day.
The quarry side has its own story, and so does the hand-splitting skill that turns a block into rough tiles. This article picks up where both of those leave off: after the splitter hands the rough blanks to the finishing line, and follows them through to the moment the crate is sealed.
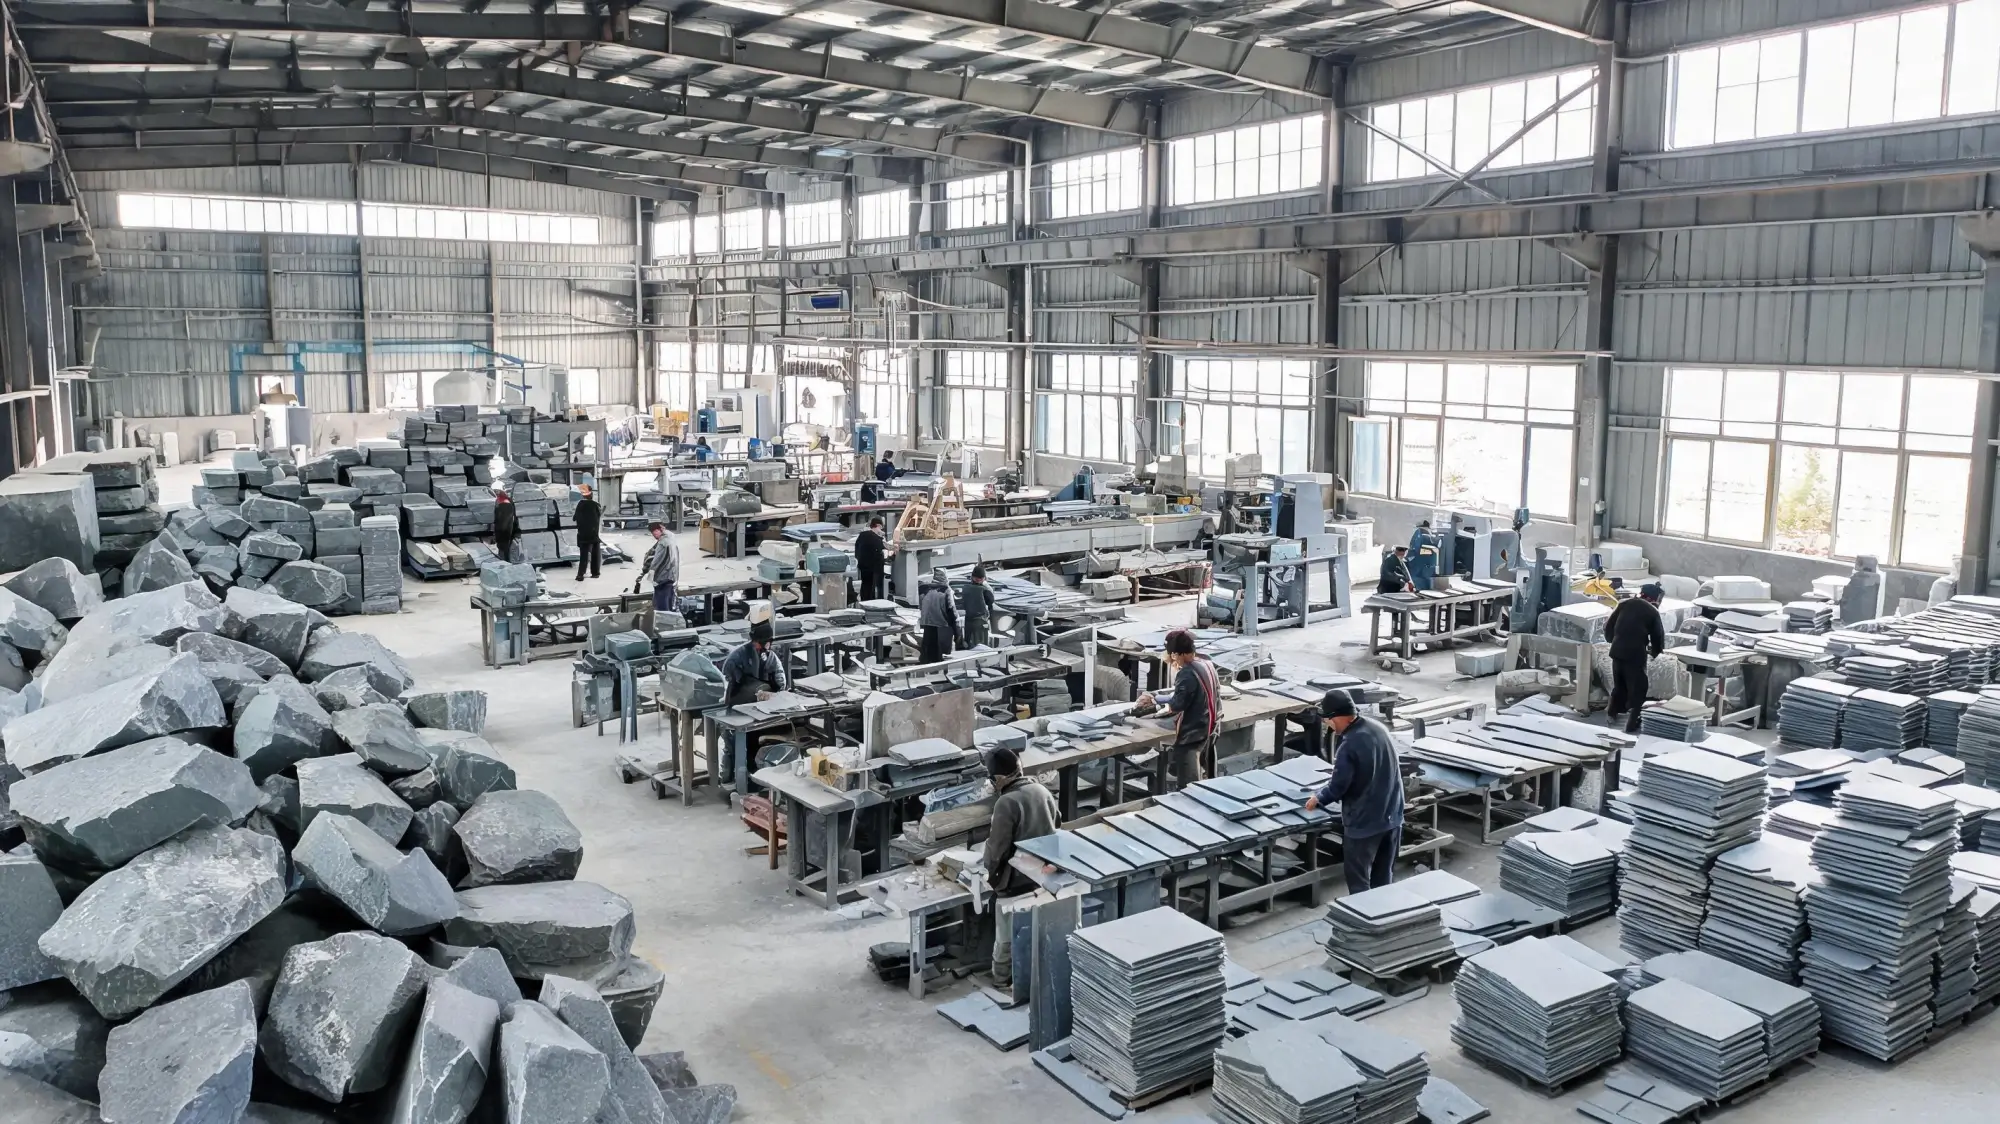
Station 01: Splitting
The block sits in the splitting area of the factory yard. It has been here since the front loader dropped it off from the quarry — sometimes the same day, sometimes after a few weeks in the storage yard where it weathered and settled. Slate that has rested for a few weeks tends to split more cleanly than fresh-cut blocks. Old quarry hands say the stone "relaxes." Whatever the reason, the effect is real.
The splitter takes over from here. A roofing-grade block — the 80% of production that the quarry foreman marked R — does not need to be enormous. A block 2 metres long and 1 metre wide yields 60 to 80 square metres of finished tile, which is enough for a substantial roof. The splitter reads the grain, sets the first line, and begins striking along the cleavage. Each layer comes off the block as a rough blank, 5 to 8 millimetres thick, roughly the length and width of the parent block but with irregular edges and a slightly uneven surface.
These blanks are not tiles yet. They are raw material. The splitting station produces rough blanks at a rate of 8 to 12 square metres per hour for a skilled splitter working a cooperative block. The blanks go straight to the dressing bench — there is no waiting, because the sooner they are dressed, the easier the edges are to work. Slate dries quickly at the surface, and dry slate edges chip more readily under the dressing tool.
The full craft of splitting — reading the grain, choosing the chisel angle, listening to the crack — is a skill that deserves its own treatment. What matters on the production line is this: the splitting station sets the thickness. Everything downstream works within the thickness the splitter gives them. A splitter who consistently produces blanks in the 5 to 7 millimetre range makes the rest of the line run smoothly. A splitter whose blanks wander between 4 and 10 millimetres creates grading headaches at Station 06.
Station 02: Dressing
A rough blank comes off the block with four irregular edges. Two edges — the ones that broke along the cleavage — are reasonably straight but not square. Two edges — the ones that were the outer faces of the block — are rough, sometimes curved, often several millimetres thicker than the centre. Dressing is the station where these edges are squared and the blank is brought to a uniform thickness profile.
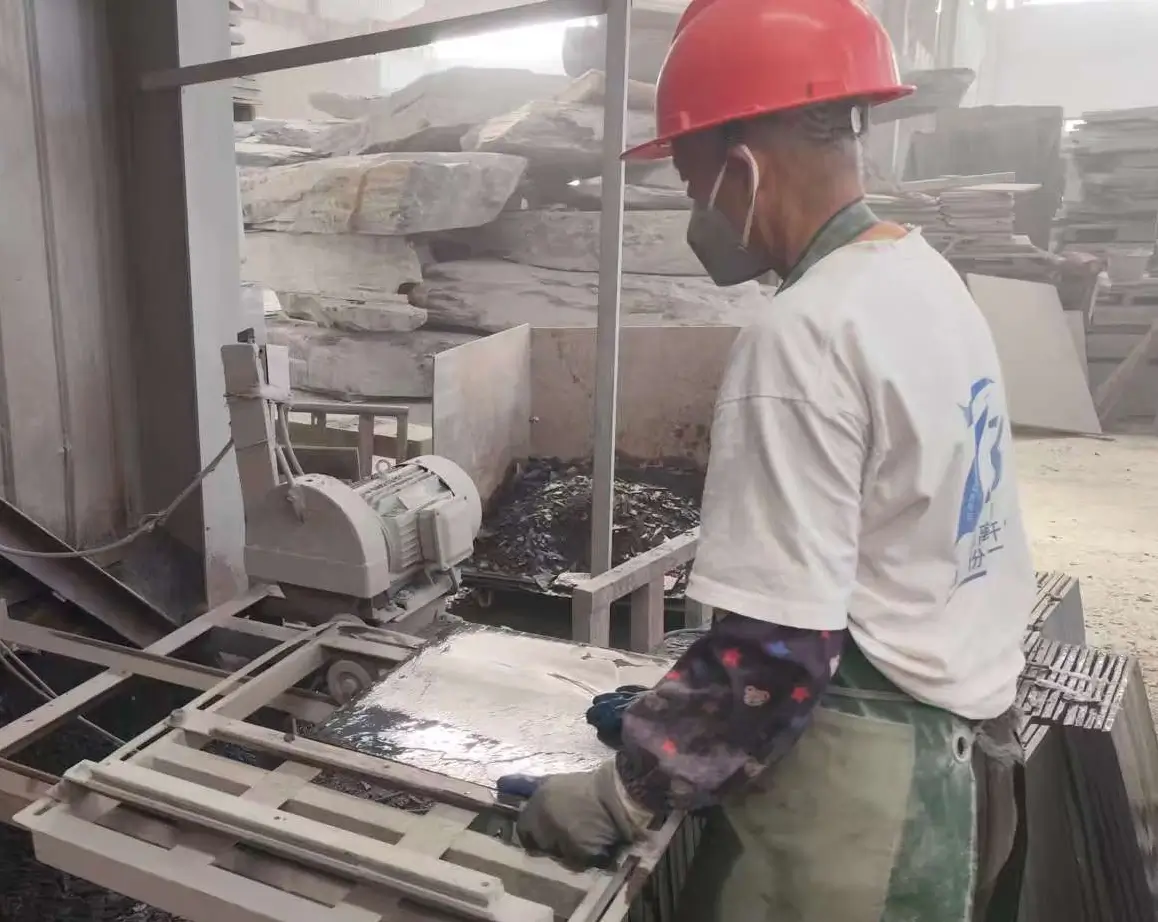
The dressing tool is a steel blade — not a chisel, but a flat, wide blade with a bevelled edge, like a large gardener's trowel. The dresser holds the blank flat on the bench, runs the blade along the edge at a shallow angle, and shaves off the irregular material. The motion is smooth and controlled — not a strike, but a draw, pulling the blade toward the body. Each pass removes a millimetre or two of stone. Three or four passes per edge is typical for a well-split blank; a blank with badly curved edges may need six or eight.
The dresser also checks for thickness variation across the blank. If one corner is significantly thicker — anything over 2 millimetres difference from corner to corner — the dresser shaves the thick spots down from the edge, working inward. The goal is not a perfectly flat tile at this stage. The goal is a blank where the thickness variation is under 1.5 millimetres, because the sizing station cannot fix thickness — it only cuts length and width. Thickness is set at splitting and refined at dressing, and after that, the tile is what it is.
A dresser working at full pace handles a blank every 2 to 3 minutes. The dressed blank now has four reasonably square edges and a thickness that varies by no more than 1.5 millimetres across the tile. It looks like a tile — but it is still the wrong size.
Station 03: Sizing
The dressed blank goes to the sizing station, where it is cut to exact dimensions. This is the station where the blank becomes a tile with a specification.
Standard roofing slate sizes in our production are 500×250 mm, 600×300 mm, and 400×200 mm, with custom sizes cutting on request. The sizing station uses a wet circular saw — a diamond blade running in a water bath — to cut the blank to length and width. The water keeps the blade cool and suppresses dust. The cut is precise: dimensional tolerance at this station is ±1 millimetre, which is well within the ±2 millimetre standard that most roofing specifications allow.
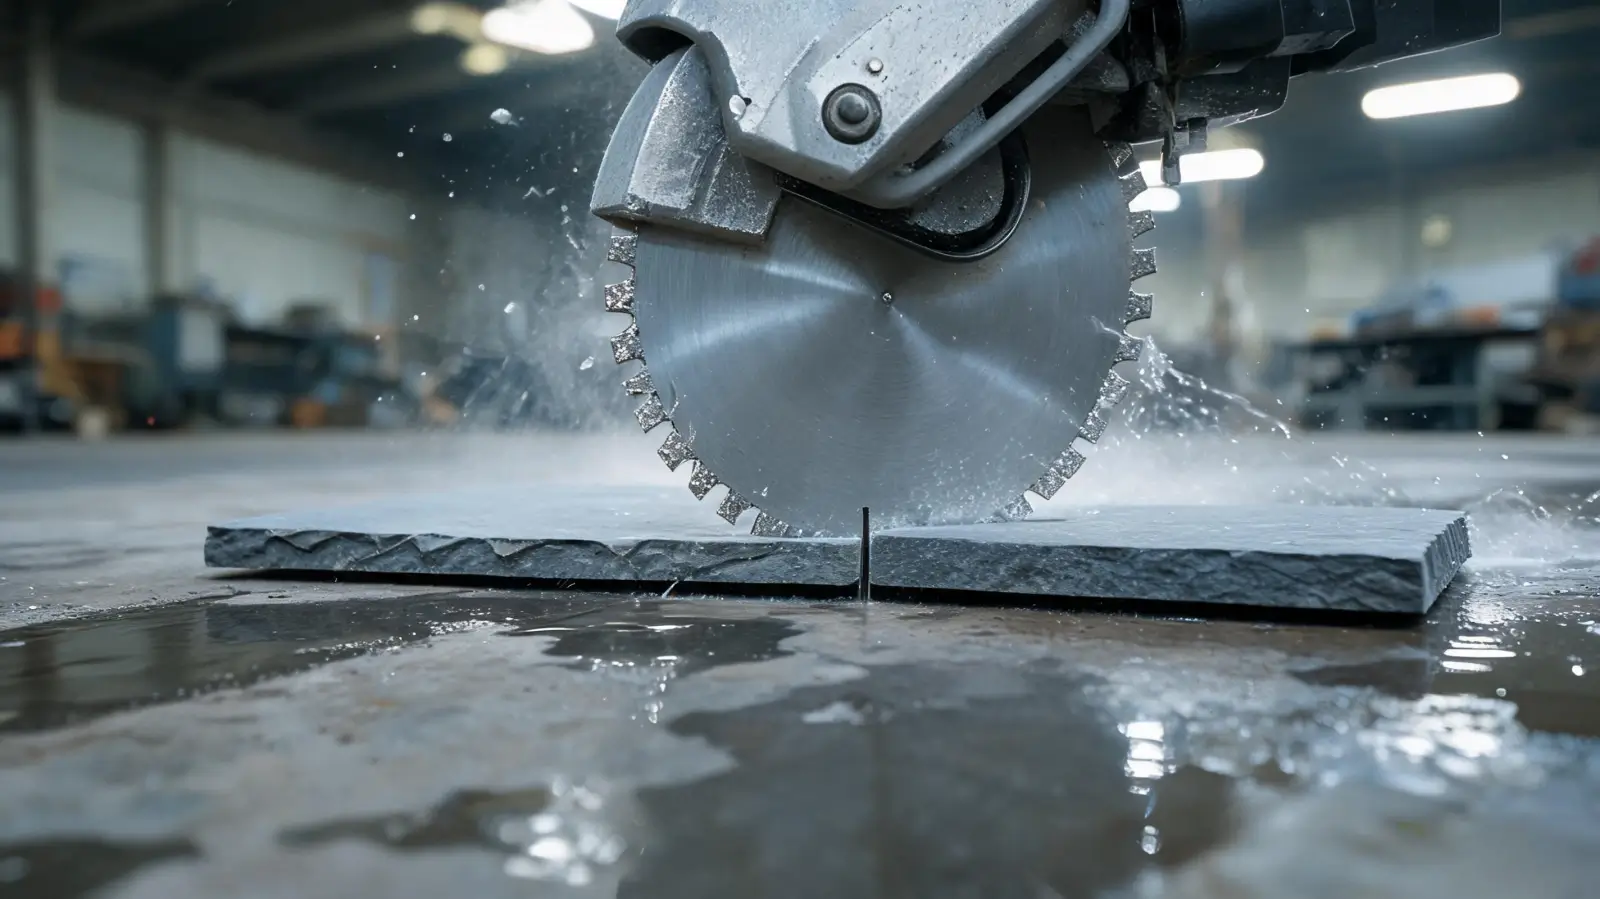
The sizing operator measures the blank, calculates the cuts to minimise waste, and runs the saw. For a 500×250 mm tile from a blank that is 510×260 mm, the operator trims 5 mm off the length and 5 mm off the width — two quick cuts, a total of 30 to 60 seconds. For a blank that is larger, the operator can cut two tiles from one blank, but this requires the blank to be at least twice the target width, which means the splitter had to produce a blank at least 520 mm wide. This is planned at the splitting station — the splitter knows the order specification and splits the block to a width that allows two tiles per blank when possible.
Waste from sizing is small — typically 5 to 8% of the blank area. The offcuts are not thrown away. Larger pieces go to paving or cladding production. Smaller pieces go to slate crafts — coasters, placemats, signs. A block that yields 70 square metres of roofing tile also produces several square metres of secondary product from its offcuts. Nothing leaves the factory as waste unless it is dust.
The sized tile now has the right length, the right width, four square edges, and a thickness set at splitting and refined at dressing. It has become a tile. But it is still wet from the saw, and it has no nail holes. Two stations remain before it can go near a roof.
Station 04: Drying
Slate is a natural stone with a tested water absorption of 0.1 to 0.2 percent. That is extremely low — among the lowest in the industry — but it is not zero. The splitting process exposes fresh cleavage surfaces that absorb moisture from the air and from the wet saw's water bath. The drying station removes that moisture before the tile is graded, inspected, and packed.
Drying is not dramatic. The tiles are stood on edge in rows on a rack — the same orientation they will be packed in crates — and left. The factory has a covered drying area with good ventilation but no artificial heat. Natural airflow does the work. In summer, tiles are dry in 24 hours. In the humid Jiujiang winter, when the air is heavy and temperatures drop, drying can take 48 to 72 hours.
Why does drying matter? Two reasons. First, moisture in the stone at packing time can cause condensation inside the crate during ocean shipping. A crate that ships from Jiujiang to Rotterdam spends four to six weeks at sea, with day-night temperature swings of 15 to 20 degrees. Condensation inside a sealed crate can stain the tile surfaces — a faint white mineral bloom called efflorescence that buyers mistake for a defect. Drying before packing eliminates the risk.
Second, a tile that has not been allowed to stabilise may change dimension slightly as it dries. The change is small — under 0.5 millimetre — but on a production line that cuts to ±1 millimetre tolerance, half a millimetre matters. Tiles that are graded and inspected at full dryness are the dimensions the buyer will receive.
The drying station is the slowest on the line. Everything else operates in minutes per tile. Drying operates in days. This is why the factory runs drying as a batch process — the day's output from Stations 01 to 03 goes onto the drying racks, and the drying rack from three days ago comes off for grading. The line keeps moving because multiple batches are in the air at once.
Station 05: Hole Punching
Every roofing slate needs at least one nail hole — sometimes two, depending on the fixing method and the tile size. The hole punching station puts those holes in.
For standard roofing tiles, the hole is punched, not drilled. Punching is faster and produces a cleaner break. The tool is a hand-operated punch — a lever press with a hardened steel pin that drives through the tile. The operator positions the tile on a jig, pulls the lever, and the pin pushes through the slate in a fraction of a second. The hole is circular, 4 to 5 millimetres in diameter, with a clean edge. Punching takes about 30 seconds per tile, including positioning.
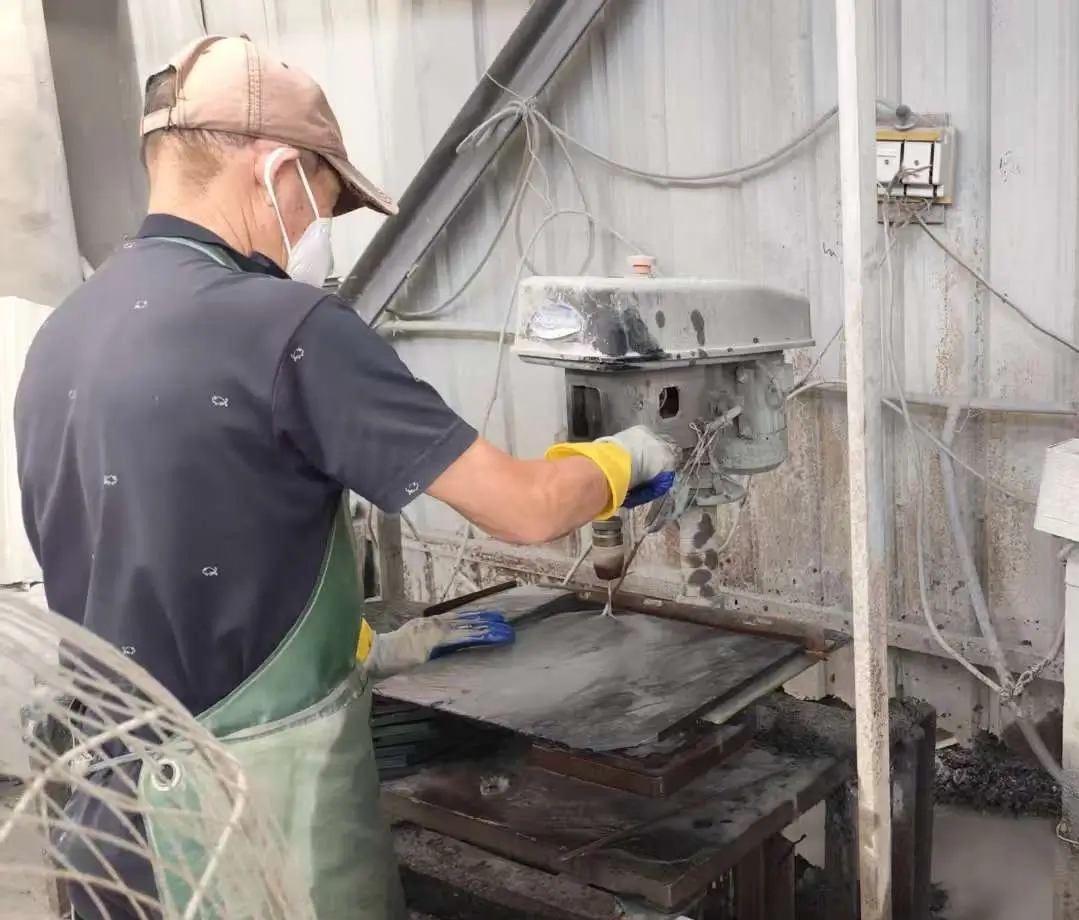
The hole position is set by the jig. For a 500×250 mm tile fixed with a single centre nail, the hole goes 40 to 50 millimetres from the head edge, centred on the width. For dual-nailed tiles, two holes go 40 to 50 millimetres from the head, roughly 60 millimetres in from each side. Hook-fixed tiles need no holes at all — the hooks grip the tile edges — and these skip this station entirely.
The hole position is not arbitrary. It must be above the overlap line — the point where the course above covers the course below — so that water cannot reach the nail. The headlap dimension determines this position, which is why the order specification includes the headlap requirement before production begins. A tile punched at the wrong headlap is useless for that roof, which is why the jig is set against a specification sheet, not by eye.
One detail that catches buyers off guard: the nail hole is punched from the back of the tile, not the front. The pin pushes through from the underside, which creates a slight countersink on the front face — a shallow depression where the nail head will sit. If the hole were punched from the front, the break-out on the back would create a raised lip that stops the tile from sitting flat on the batten. Punching from the back is not a preference; it is a structural necessity.
Station 06: Grading
The graded tile is the product the buyer sees. Grading is where the line sorts tiles into saleable categories, and where the production controller checks whether the splitter and dresser did their jobs.
Three factors determine the grade: thickness, colour, and soundness.
Thickness. The target for standard grade is 5 to 7 millimetres. Select grade runs 5 to 6 millimetres — tighter, lighter, for projects where weight matters or where a uniform appearance is required. Commercial grade runs 7 to 10 millimetres — heavier, thicker, for budget projects or where the roof structure can carry additional load. Anything thinner than 4 millimetres or thicker than 10 millimetres is pulled off the line. The thin ones are too fragile for roofing; the thick ones go to paving.
Colour. Jiujiang slate ranges from deep charcoal to blue-grey to a faint green-grey. The colour variation is natural — it comes from minor differences in mineral content across the deposit. The grader sorts tiles into colour batches: A (darkest, charcoal), B (blue-grey), C (lighter, green-grey). A single order is packed from a single colour batch unless the buyer requests mixed tones. The natural weathering process will blend these tones over the first few years on the roof, but at the factory, the grader's job is to give the buyer a consistent starting point.
Soundness. The grader taps each tile with a small hammer — a sound test. A clear ring means the tile is solid. A dull thud or a rattle means there is a hidden fracture or delamination that the splitter and dresser did not catch. A tile that fails the sound test is rejected on the spot. This is not the formal inspection — that is Station 07 — but it catches the obvious failures before the tile goes to the inspection bench.
The grading station processes about one tile per minute. Each tile is measured, colour-matched, tapped, and assigned a grade. The grader stacks the tiles by grade — select, standard, commercial — and each stack goes to the inspection station with a grade card that records the date, the block number, and the grade.
Station 07: Inspection
This is the station that gives the production line its credibility. Every tile — not a sample, not a batch, every single one — passes through the inspection bench before it goes into a crate.
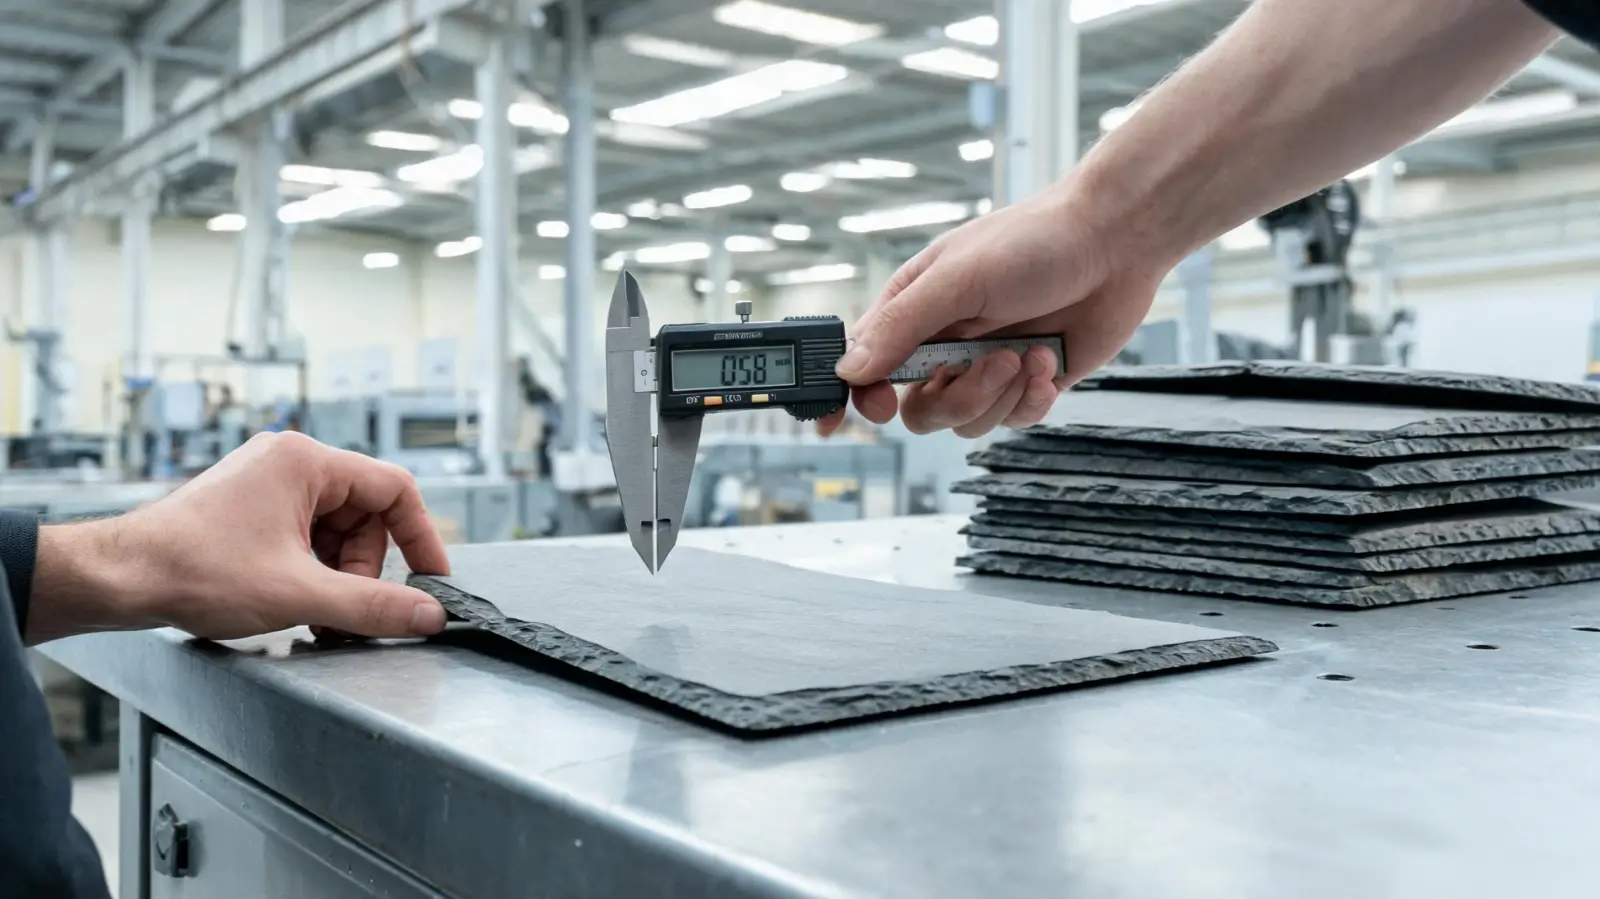
The inspector has four checks, performed in order:
Dimensions. The inspector places the tile on a jig with stops at the nominal length and width. A tile that fits within the stops passes. A tile that is too long or too wide goes back to the sizing station for a re-cut. A tile that is too short or too narrow is downgraded — it cannot be re-cut because cutting it smaller would lose the nail hole position.
Thickness. The inspector measures thickness at four points — each corner and the centre — with a calliper or thickness gauge. The variation across the tile must be under 1.5 millimetres. A tile that varies by more than that goes back to dressing if the variation is at the edges, or is rejected if the variation is in the body of the tile.
Surface. The inspector examines both faces. The cleft face — the splitting face — should show natural texture with no cross-fractures, no step breaks, no soft patches. The back face should be clean with no delamination. Surface defects that do not affect structural integrity — a slight colour streak, a small mineral vein — are noted but the tile passes. Structural defects — a crack, a step, a soft area — are rejected.
Sound. The inspector repeats the tap test. Even though the grader already tapped the tile, the inspector taps again — because a tile that passed the grader's ear can sometimes fail the inspector's ear. The grader works fast; the inspector works deliberately. A second dull thud means the tile comes off the line.
The inspection station takes about 2 minutes per tile. For a container order of 1,000 square metres — roughly 8,000 to 10,000 tiles depending on the size — that is 250 to 330 hours of inspection time. The factory runs two inspectors in parallel during peak production. This is why inspection is not a sample-based process. A 1% reject rate at this station means 80 to 100 tiles pulled from a container order. Those tiles go back to paving, cladding, or crafts. Nothing is wasted.
Station 08: Crate Packing
The final station is where the tile journey ends — or rather, pauses. The tiles are stacked into wooden crates, sealed, and made ready for the container.
The crate is built from pine or poplar — softwood, because hardwood crates can stain the slate through tannin transfer. The crate is lined with a moisture barrier — a layer of waterproof paper or plastic film — that protects the tiles from condensation during the ocean crossing. Inside the crate, the tiles stand on edge, not flat. Standing on edge prevents the tiles from sticking to each other if any residual moisture is present, and it distributes the weight evenly across the crate so the bottom tiles are not crushed by the ones above.
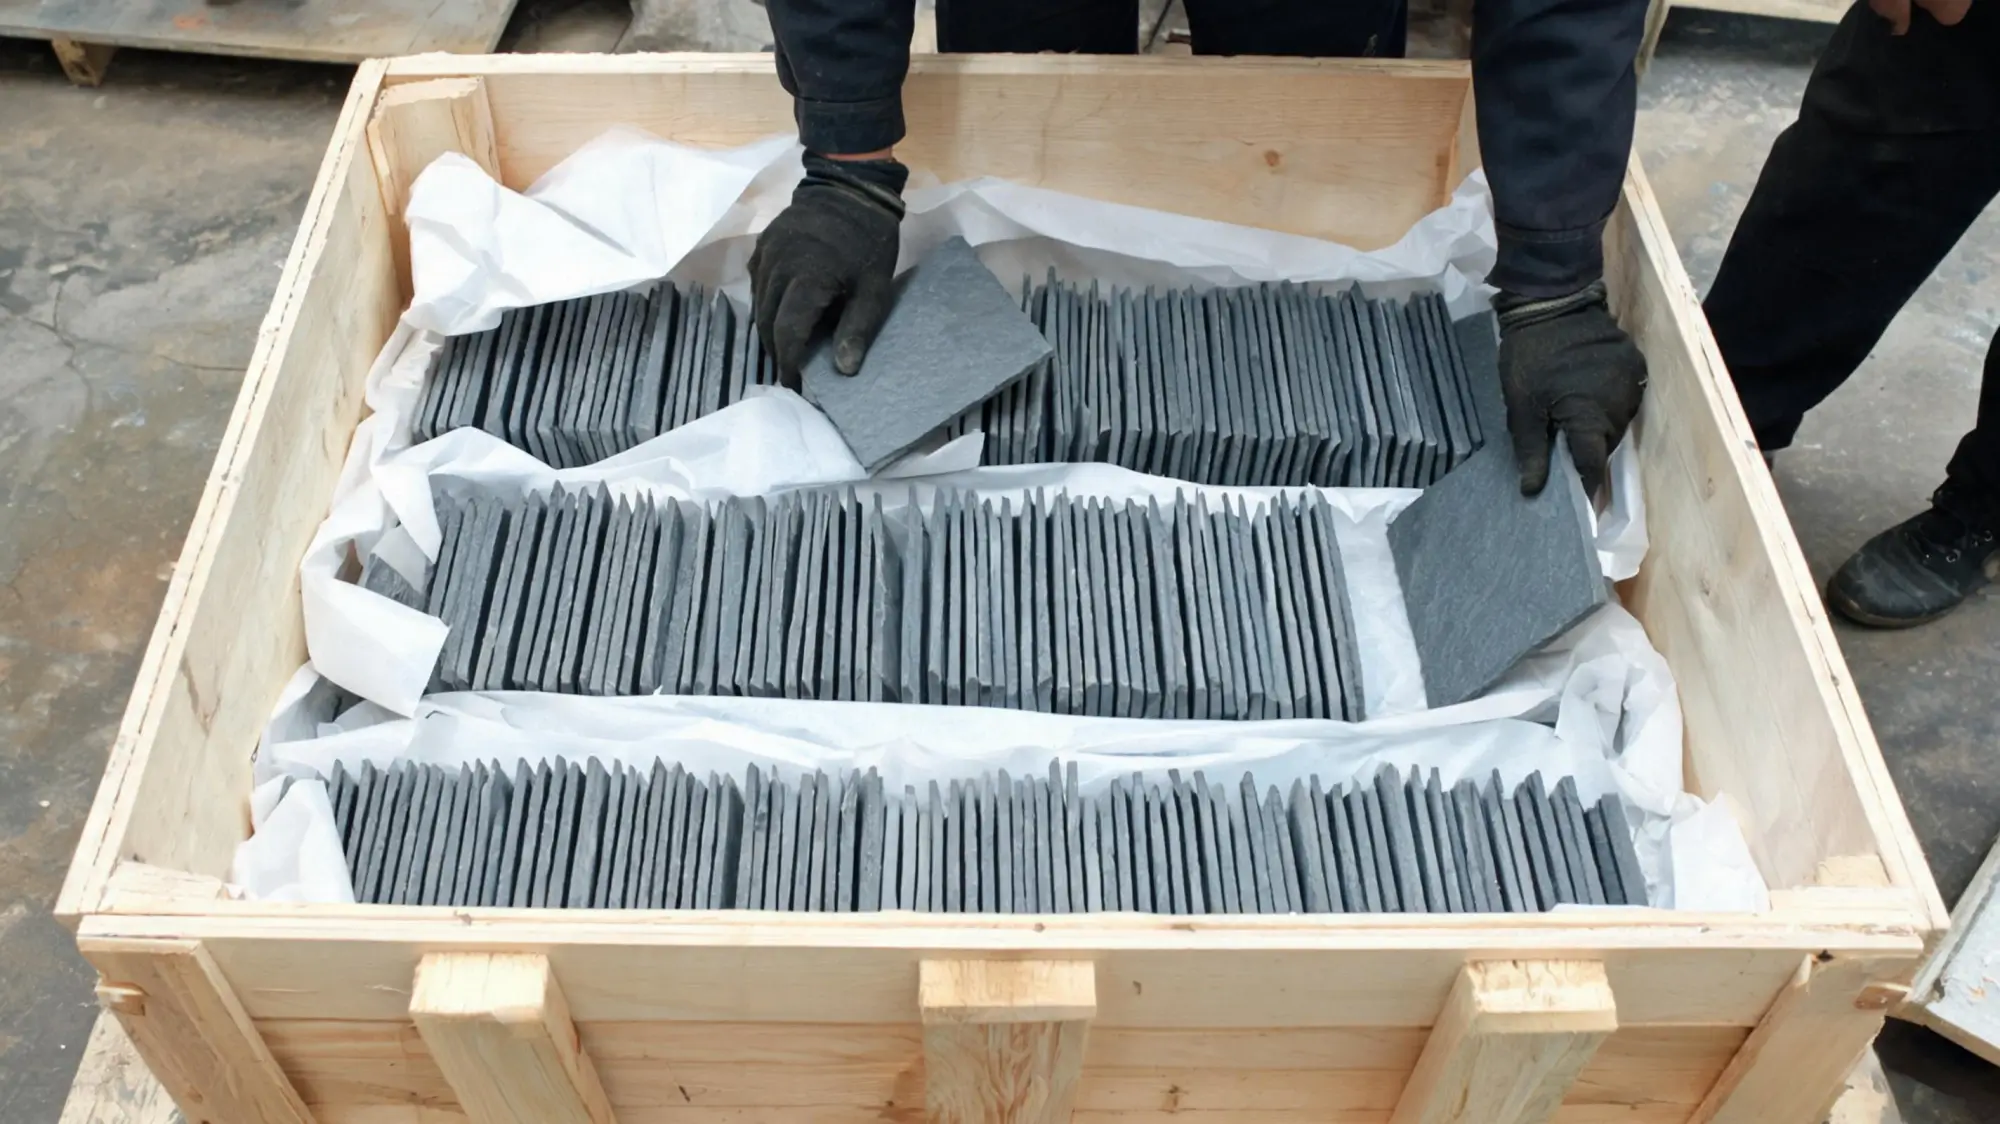
Between each layer of tiles, a thin sheet of paper is placed — not for cushioning, but to prevent surface-to-surface contact. Slate is hard, but slate against slate under vibration can micro-chip the edges. The paper interleaf takes the friction.
The crate is filled to a standard count. For 500×250 mm tiles at 5 to 7 mm thickness, a standard crate holds 100 square metres — 800 tiles. For 600×300 mm tiles, the same crate holds 108 square metres — 600 tiles. The crate is weighed on a platform scale before sealing. A standard crate of 100 square metres of 7 mm slate weighs about 1,800 to 2,000 kilograms — roughly 18 to 20 kg per square metre, which aligns with the density calculation of 2.7 kg per millimetre of thickness per square metre.
The crate is sealed with steel strapping — two bands across the width, one along the length. A label on the outside records the block number, the grade, the tile size, the quantity in square metres, the number of tiles, the weight, and the date. That label is the last piece of the tracking chain that started at the quarry face with a chalk mark on the rock.
A 20-foot container holds 20 to 38 crates depending on tile thickness — thinner tiles mean more square metres per crate and more crates per container. The container is loaded at the factory: an empty container is trucked from Jiujiang port to the factory, the crates are loaded by forklift, and the full container is trucked back to the port. The tiles do not pass through a third-party warehouse. This is not a convenience — it is a quality control measure. Every transfer point is a risk point. Loading at the factory gate means the crates go from our floor to the ship in one move.
The Tracking Card
Every crate that leaves the factory carries a tracking card. The card records the block number from the quarry, the date the block was split, the splitter's name, the grade, the inspector's name, the packing date, and the container number. If a buyer opens a crate in Rotterdam or Hull or Auckland and finds a problem, the tracking card traces the tile back to the block, the day, and the person who made it.
That is the tile journey. Not a marketing story — a production record. From the moment the block enters the factory to the moment the crate is sealed, eight stations handle the tile, and each station has a specification, a tolerance, and a person responsible. The block that arrived as 25 tonnes of raw rock leaves as 1,000 square metres of roofing, packed in crates, ready for a roof somewhere in the world.
Frequently Asked Questions
How long does the full tile journey take from block to crate?
From the moment a block arrives at the factory to the moment the crate is sealed, the production time is typically 5 to 7 working days. The bottleneck is the drying station, which takes 24 to 72 hours depending on humidity. Splitting, dressing, sizing, hole punching, grading, inspection, and packing together take 2 to 3 working days for a standard container order. Drying overlaps with production — tiles from today's splitting go onto the drying rack while tiles from three days ago come off for grading — so the line runs continuously rather than in a single batch.
What is the reject rate on the production line?
Typically 1 to 3% of tiles are rejected at the inspection station. The most common reasons are hidden fractures caught by the sound test, thickness variation beyond the 1.5 mm tolerance, and surface defects like step breaks or soft patches. Rejected tiles are not discarded — they go to paving, cladding, or slate crafts production. The reject rate is higher for blocks with irregular grain or visible veining, which is why the quarry foreman's block selection matters: a well-chosen block produces fewer rejects downstream.
Why are tiles packed on edge instead of flat?
Two reasons. First, tiles packed flat can stick to each other if any residual moisture is present after drying — the moisture creates a slight bond between the smooth surfaces. Standing on edge prevents surface-to-surface contact over the full face area. Second, on-edge packing distributes weight along the strongest axis of the tile. Tiles laid flat in a crate put the full weight of the stack on the bottom tiles, which can crack them under vibration during shipping. On-edge packing puts the weight on the edges, which are structurally stronger.
Can the factory produce custom tile sizes not in the standard range?
Yes. The sizing station (Station 03) cuts to whatever dimensions the order specifies, within the limits of the block size. A block that is 2 metres long can produce tiles up to about 1.9 metres in one dimension — allowing for the saw kerf and edge trimming. Custom sizes require a custom jig at the hole punching station and a separate grading run, which is why custom orders typically have a longer lead time and a slightly higher per-square-metre cost.
Does the factory use machines or hand labour for the production line?
Both. Splitting is done by hand — the natural cleft surface that gives roofing slate its character and slip resistance cannot be replicated by a machine. Dressing is done by hand with a steel blade. Sizing uses a diamond wet saw. Hole punching uses a hand-operated lever press. Grading and inspection are done by hand — the sound test and surface examination require human judgement. Crate packing is manual. The only powered machine on the roofing line is the wet saw. This is not a limitation — it is the nature of the material. Slate is a natural stone, and every tile is slightly different. The production line is designed to work with that variation, not against it.
How are tiles tracked from the quarry to the crate?
Every block carries a chalk number from the quarry face. That number follows the block to the storage yard, then to the factory. At the splitting station, the number is transferred to the rough blanks. At the grading station, the number goes on the grade card. At the crate packing station, the number goes on the crate label and the tracking card inside the crate. If a buyer finds a problem in any tile, the block number on the crate traces it back to the section of quarry face it came from, the date it was cut, and the splitter who handled it.
Related Reading
Need roofing slate tracked from quarry to crate?
Every order ships with a tracking card that traces your tiles back to the block, the splitter, and the date. Send us your specification — sizes, thickness, headlap, quantity — and we will walk you through the production timeline.