
Corners, Trim and Finishing Details for Natural Slate Cladding
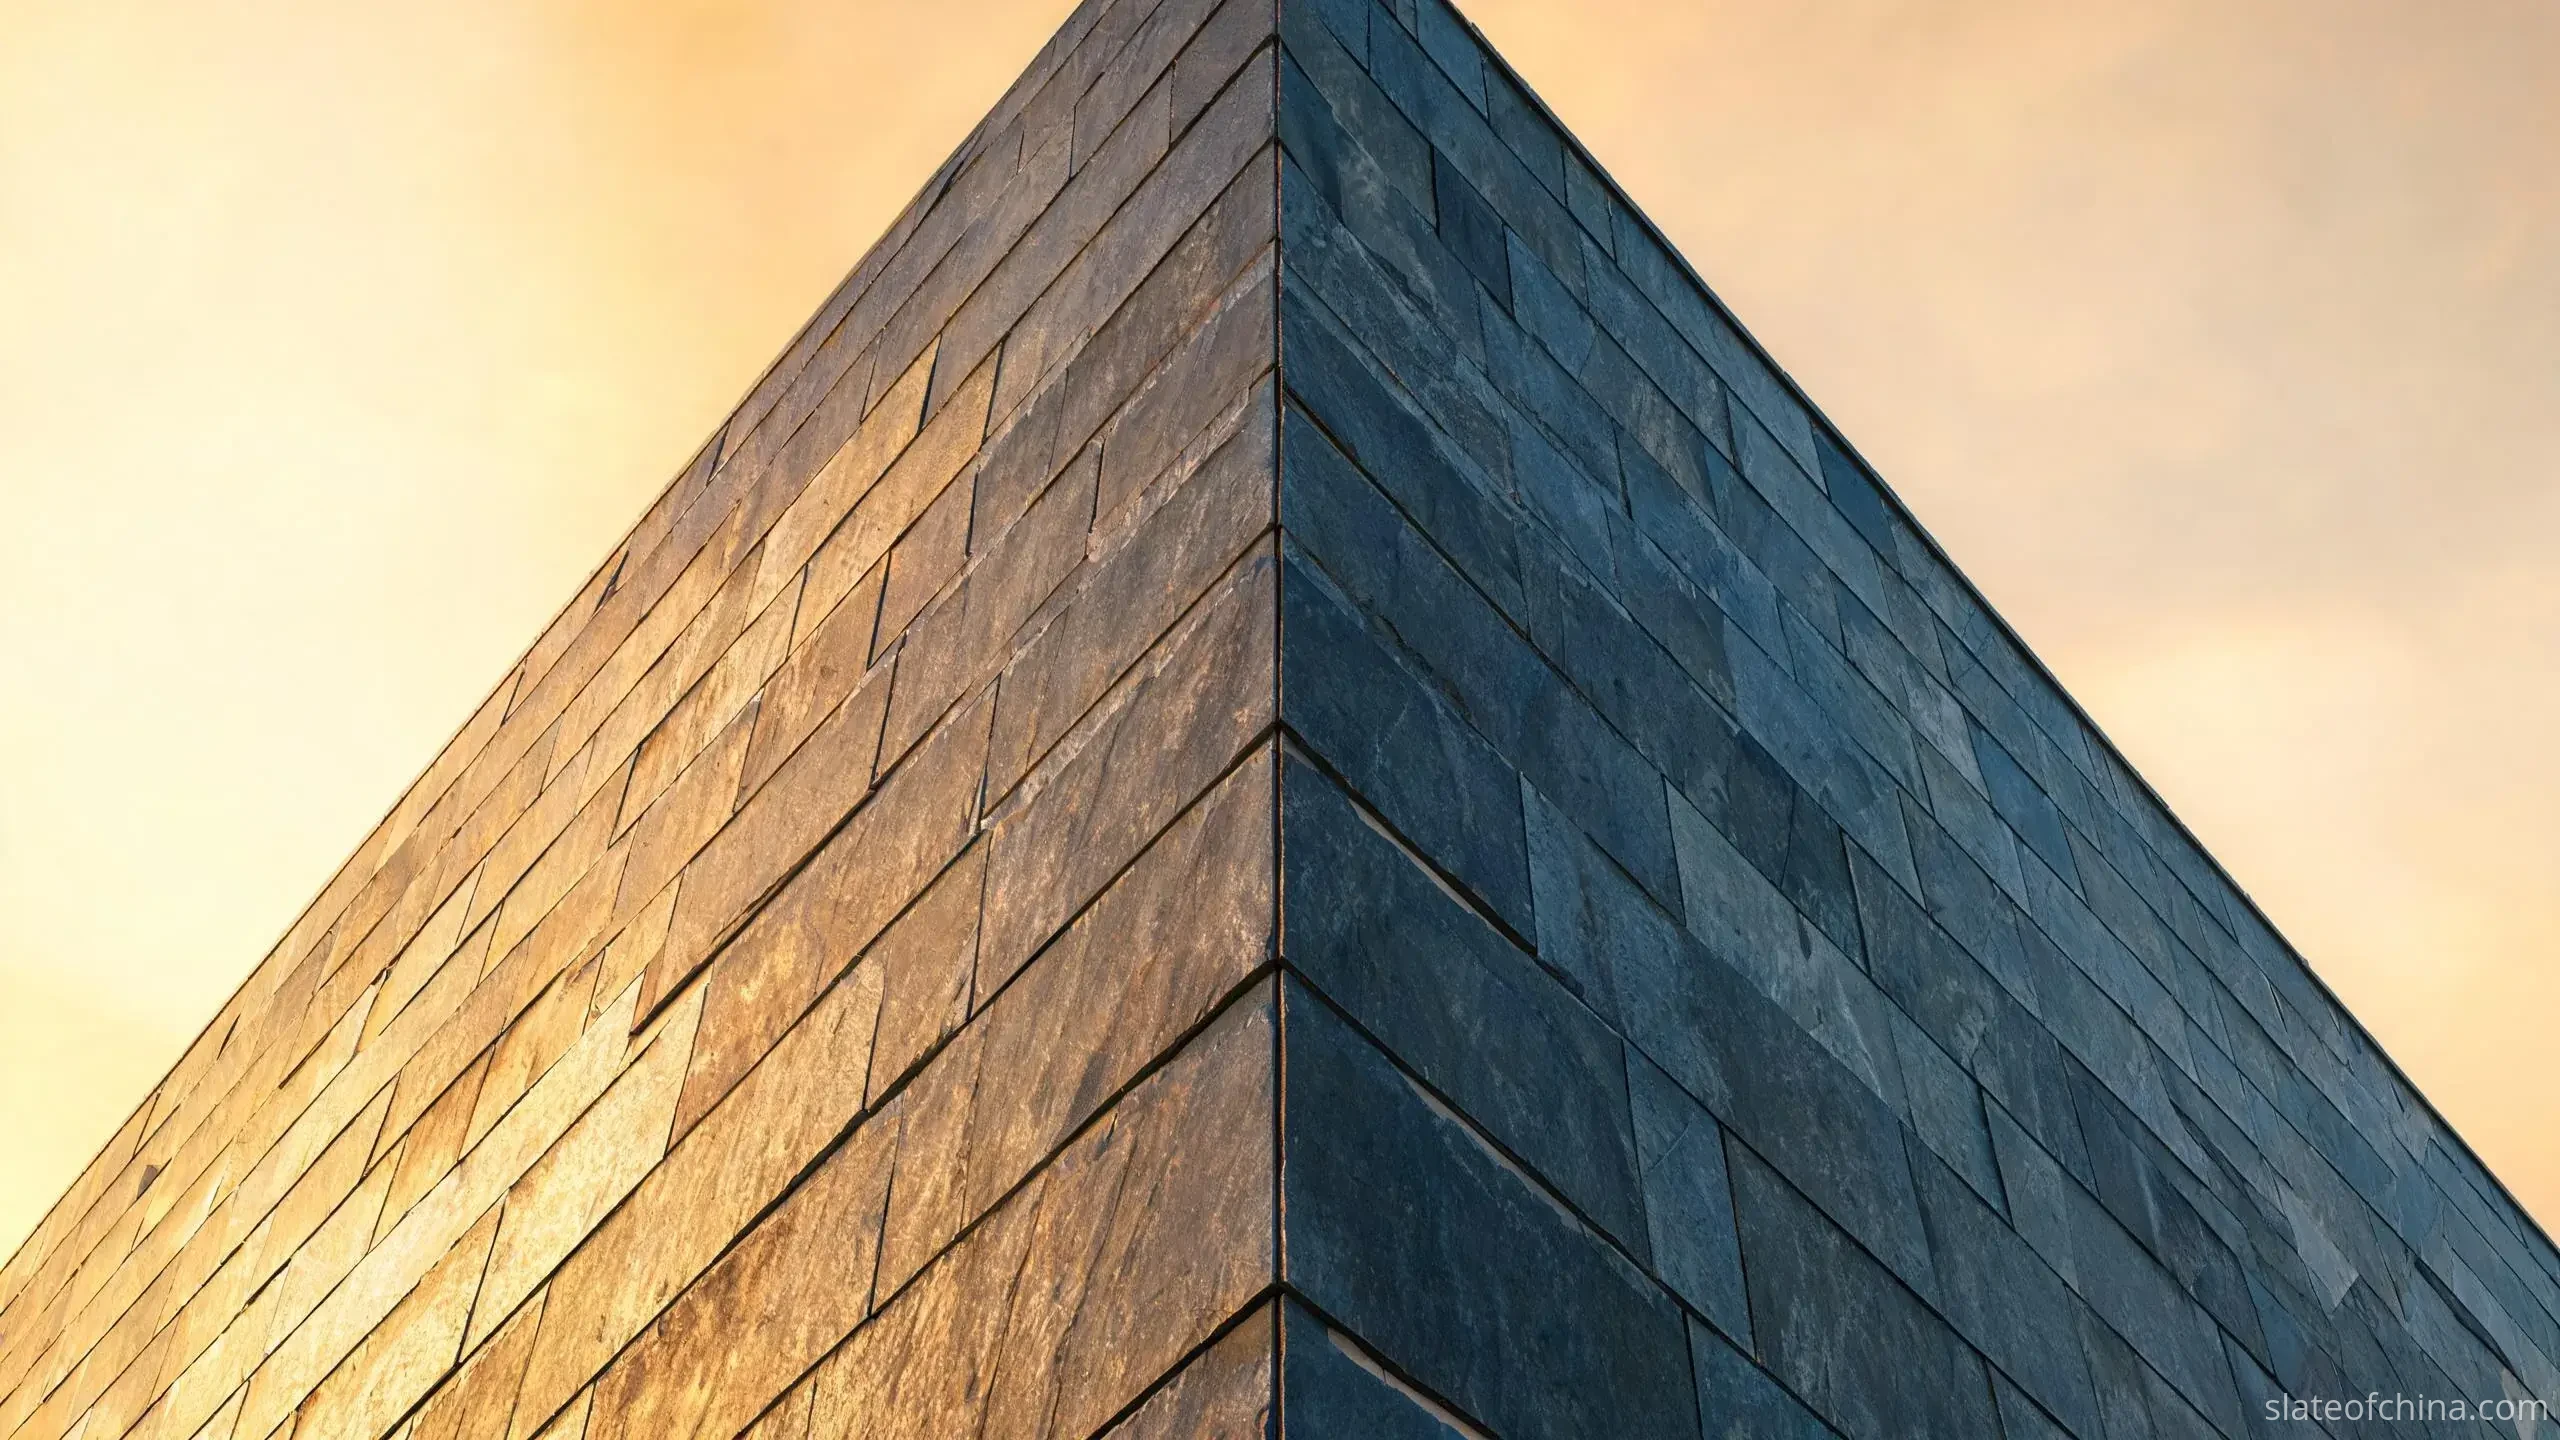
Stand across the street from a finished slate-clad building. For the first few seconds the eye rests on the panels – the colour band, the coursing, the light moving across a cleft face. Then, without being asked, it goes looking for trouble. It runs down the corner to see whether the line is straight. It follows the horizontal joints into a window opening to see whether they survive the turn. It drops to the base of the wall, and it finishes wherever the slate stops and something else begins.
That instinct is correct. The broad field of panels is where a facade earns its texture, but the junctions – the corners, the reveals, the exposed edges, the base, the transitions – are where it earns the word finished. Slate facade finishing details carry the water management, the movement allowance and the edge protection, and they are the one part of the wall an installer cannot improvise well at 4 p.m. on a Friday.
This guide walks one wall through its five junctions the way your eye does, and then turns the walk into paperwork: what to measure, what to draw, and what to write on the order so that slate cladding corners, window reveals and edge profiles arrive as parts of a plan rather than as lucky offcuts. If you are new to the material, the buyer's overview of slate wall cladding covers the panel families these details attach to.
Quick answer. Between the panels sit the details that decide how the wall reads: slate cladding corners, window reveals, edge profiles, the base and the transitions. All five are ordered decisions, not site decisions:
- External corners – mitred, butt-jointed, corner units or metal-trimmed; chosen before fabrication.
- Window reveals – jambs, heads and sills are three different orders, cut to measured openings.
- Exposed edges – sawn, chamfered or shadow-gapped; the cut edge is a design surface in its own right.
- Base and parapet – drainage, ventilation and movement are coordinated at these junctions, with flashings, membranes and metal profiles performing functions the slate itself cannot replace.
- Material transitions – every change of material is a drawn joint with an owner.
Each section below is one stop on the walk: what the eye checks, what water checks, and what the order should say.
1. Why the Junctions Decide the Look
Four things are decided at the junctions that the field panels never have to answer for.
Alignment. Joints should read as intentional as they pass a corner or approach an opening. A run of randomly sized infill beside a window can undo an otherwise disciplined elevation.
Exposure. A cladding panel is exposed to changes in temperature, moisture and wind loading, while its exposed edges may be particularly vulnerable to impact and local chipping. The risk depends on the slate's thickness, cleavage characteristics, edge treatment and fixing arrangement – and an exposed arris can be the most delicate centimetre on the wall.
Water. External cladding works alongside the wall's weather-resistive barrier, flashings, drainage cavity and ventilation. The slate face was never the waterproof line, and the corner is where that truth gets tested first.
Practicality. Corner pieces, reveal strips, sills and trims all have to be compatible with the chosen fixing system – the stone, the bracket and the profile are one design, not three shopping trips.
Which gives the working principle for everything that follows: design the visible stone and the concealed weatherproofing together, and never ask the decorative slate to stand in for the drainage layer. Final dimensions, fixings, flashings, movement joints and code compliance belong to the qualified professionals who sign the facade design. This guide is about making sure their decisions reach the fabricator.
2. Stop One – The External Corner: Mitred, Butt-Jointed or Trimmed
At the corner, two faces of the same material meet in a single line – and the straighter that line is, the straighter the whole wall appears to be.
The corner is where the slate cladding corner details are judged first, and it comes in four workable forms. None of them is universally best; each of them is a fabrication decision that has to be made before the panels exist.
Mitred slate corners
A mitre is formed by cutting the adjoining panel edges at an angle – typically 45 degrees each on a nominal 90-degree corner – so the two pieces meet along a fine, near-invisible line. On a calm, contemporary elevation it is the detail that makes the corner disappear.
Three cautions keep it honest. First, geometry: a corner specified as 90 degrees is rarely built as exactly 90, and no natural slate external corner detail survives an angle it was not cut for. If the as-built corner runs at 88, two 45-degree cuts leave a wedge-shaped gap that no amount of adjustment hides. Fabricators can cut complementary angles when they are told the measured number; they cannot guess it. Second, material: calibrated panels take a crisp mitre, while thin gauges and heavily cleft faces fight a delicate arris. A small eased edge on the mitre trades a little sharpness for a lot of chip resistance. Third, the joint: a mitre is still a joint, sized by the fixing method, tolerances and expected movement – not a promise of zero width.
For scheduled, repetitive work on calibrated slate, mitred corners are usually cut in the factory, where the angles, the edge and the batch colour are controlled in one pass. The panels on both faces are still carried independently by the approved fixing system; the mitre joins appearance, not structure.
Butt-jointed and expressed-thickness corners
The plainer alternative lets one panel run through while the adjoining panel butts against its cut edge, so a sliver of stone thickness shows on the corner. On cleft-faced slate, where a mitre would be false precision, an expressed edge is the honest detail – and it is far more forgiving of small angles that are not what the drawing promised.
Two questions have to be answered on paper, not on the scaffold: which face leads at every corner (and whether the answer should flip on some elevations), and what finish the exposed cut edge carries. A facade that changes its corner logic halfway along a wall does not read as variety. It reads as two crews.
Corner units, and the metal alternative
Where the material format and fabrication process allow, a corner unit – a single L-shaped or return piece wrapping both faces – can provide a clean alternative to joining two separate panels, and is particularly useful for certain strip and modular cladding designs. It costs more stone per corner than a pair of flat panels, and it needs a fabricator who can cut it in the matching material.
Finally, a formed metal profile can cap the corner in aluminium or stainless steel. A dark anodised finish disappears into charcoal slate; a contrasting metallic finish turns the corner into a deliberate feature line. But a profile is an edge keeper and a visual decision, not a structural support, not a waterproofing component and not a movement joint. Profile depth, corrosion resistance, fixing arrangement and drainage compatibility all need checking against the manufacturer's data – and against the fixing method the facade actually uses, because a corner trim that fights the bracket layout is a problem discovery tour.

| Corner option | What it looks like | Specify it when | Agree in advance |
|---|---|---|---|
| Mitred panels | Two angled cuts meet in one fine line | Calibrated panels, quiet contemporary facades | Measured corner angle, eased edge, joint width, factory cutting |
| Butt-jointed edge | One panel's cut edge faces out against the other face | Cleft slate with expressed thickness | Which face leads, edge finish, consistent shadow line |
| Corner unit | A single L-shaped piece wraps both faces | Strip and modular formats; joints you want hidden | Availability in matching material, leg sizes, stone consumption |
| Metal profile | A formed trim caps the corner line | Edges needing protection, or a deliberate feature line | Alloy and finish, depth, corrosion class, fixing and drainage compatibility |
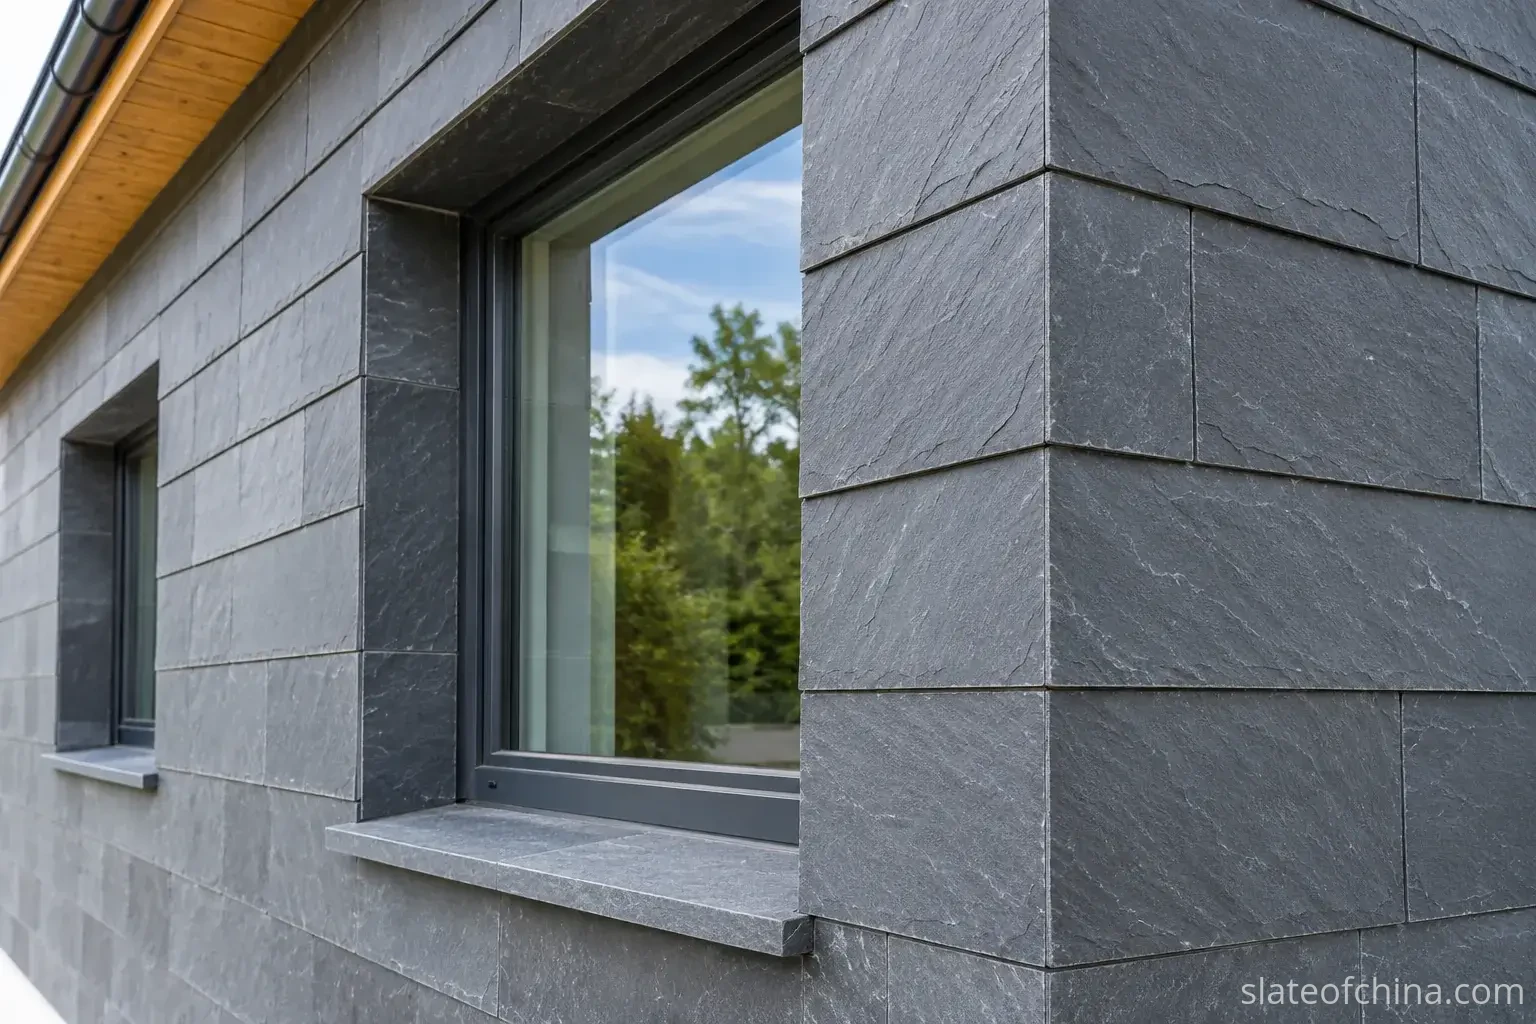
3. Stop Two – The Window Reveal: Jambs, Heads and Sills
Windows are small, and everyone walks up to them. A reveal that drifts out of true is invisible from the street and obvious from the flowerbed.
A slate cladding window reveal is where the wall has to hold tolerances on four sides at once, so it is worth treating the three components as three separate orders rather than one strip of stone.
Jambs. The jamb is the vertical return between the facade face and the window frame, and its defining number is the reveal depth – the distance from the cladding face back to the frame. That depth belongs to each measured opening: frames never land exactly where the drawing says, and openings on the same elevation can differ from one another. Where the layout allows, the horizontal joint lines of the wall carry into the reveal, which is half of what makes a window look designed into the stone rather than cut through it.
Heads. Above the window, appearance is the easy half. The head's first job is water: where the wall system requires it, head flashing with end dams and a clear path to the weeps directs water outward, and the cladding must never obstruct a designed drainage outlet. The stone return frames the view; the flashing does the weatherproofing. Neither substitutes for the other.
Sills. Below the window, the sill is a thicker stone unit with three numbers attached: the fall along its top surface, the projection past the cladding face, and the position of the drip groove under the projecting edge. Its geometry comes from the window system, the exposure and the project's flashing design – not from the stone catalogue. Because a projecting slate sill is exposed to additional bending and edge-impact risks, its thickness, support arrangement and end treatment should be confirmed in the project drawings rather than left to site judgement.
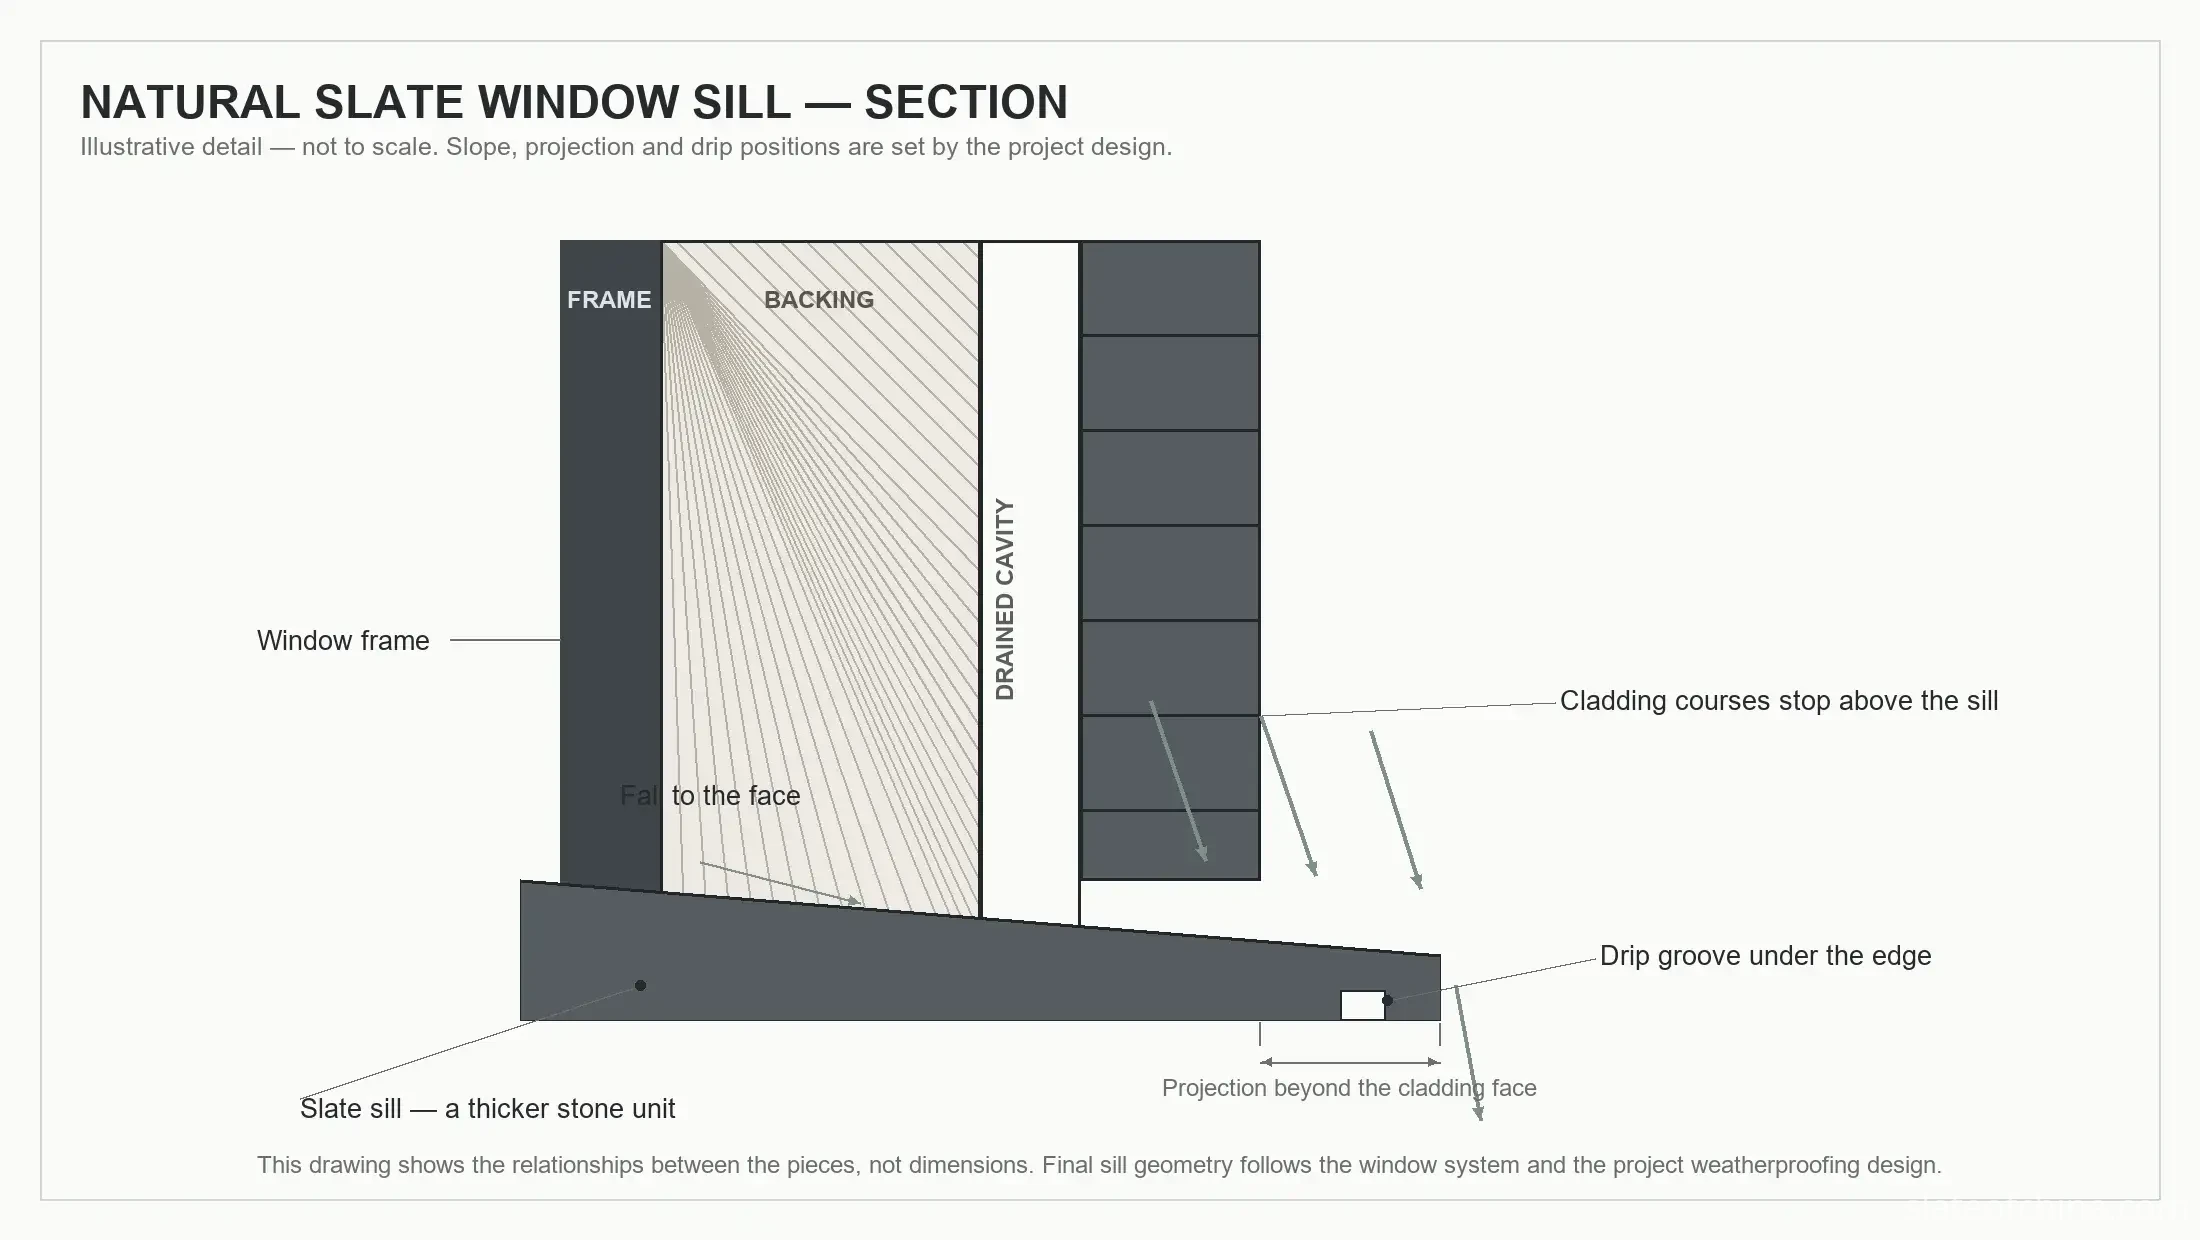
The ordering consequence is simple and often ignored: do not order window returns as generic rectangular strips. Jambs, heads and sills go on separate lines of the schedule, because their thicknesses differ, their exposed edges differ, their exposure differs – and so does the price of getting them wrong.
4. Stop Three – The Edge of the Slate Itself
Follow the wall to wherever it stops – a soffit, a door, a change of material – and the slate turns to show you a cross-section of itself. What was a face becomes an edge.
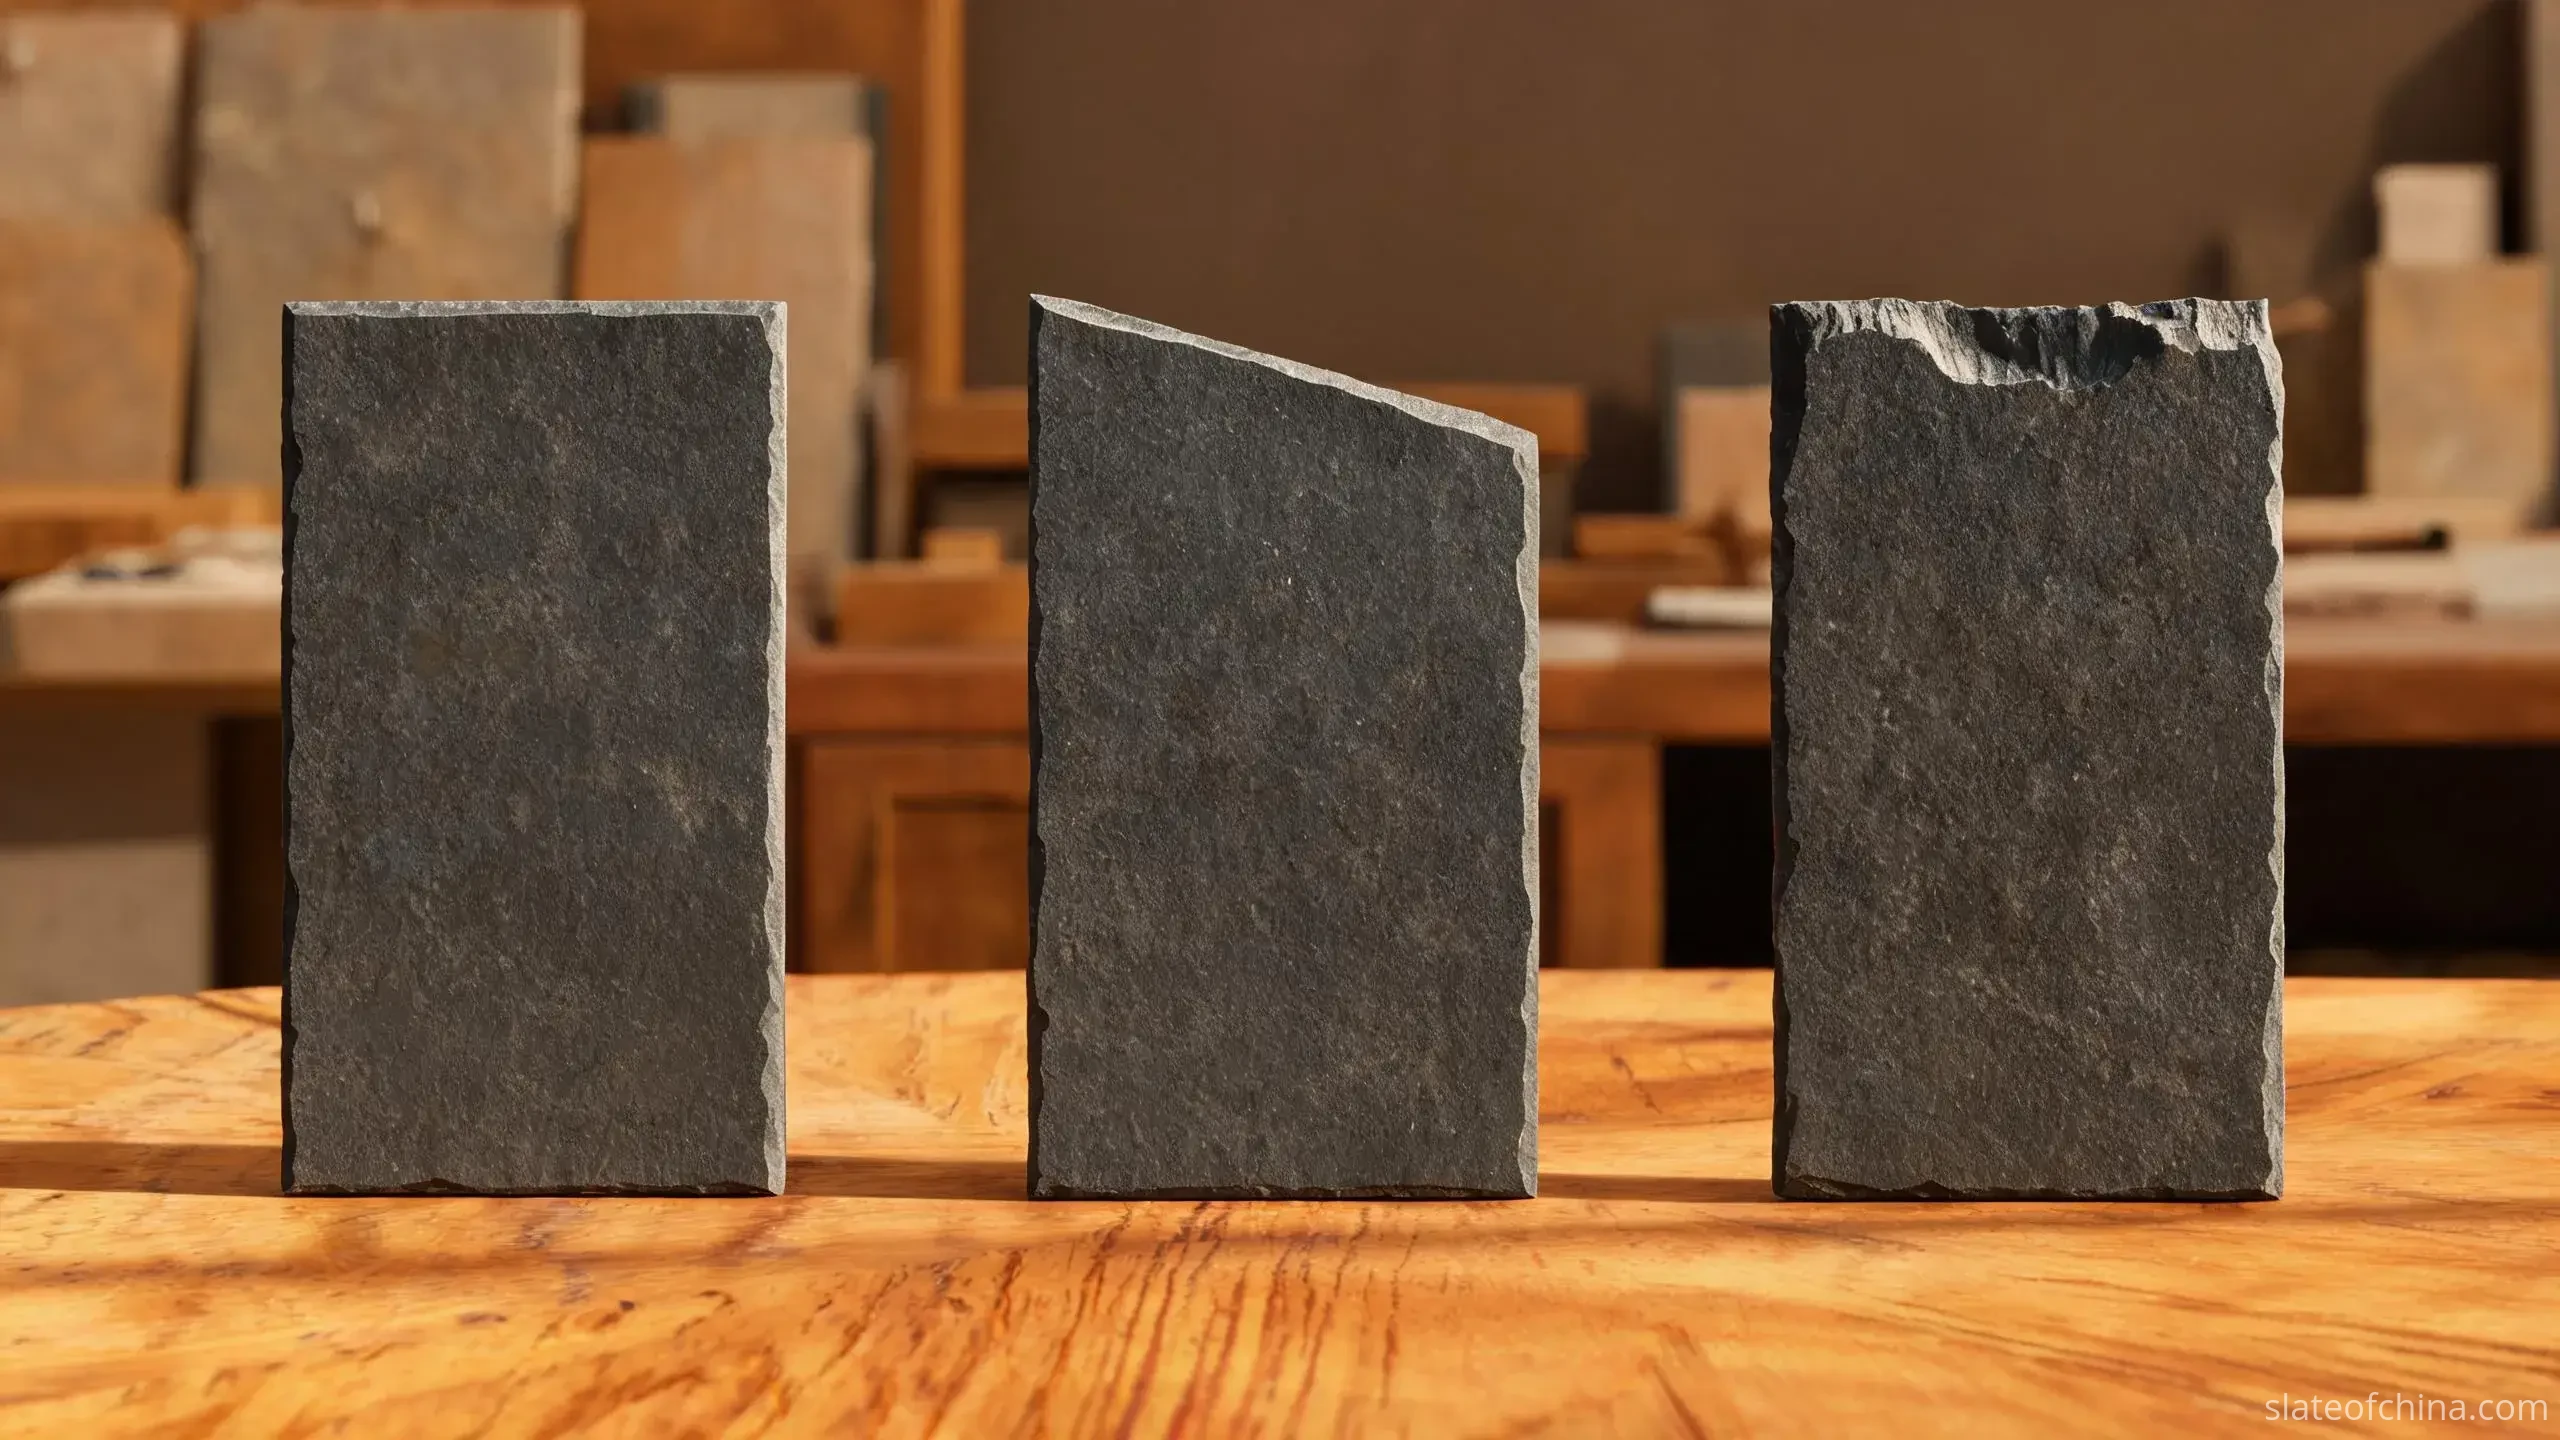
Slate wall cladding edge trim is, in practice, one of four treatments, and mixing them by accident is how a careful wall starts looking assembled.
| Edge treatment | Reads as | Suits | Notes for the order |
|---|---|---|---|
| Straight sawn edge | Crisp and deliberate | Intentionally visible cut edges on calibrated stone | Confirm the cut face is acceptable in the chosen slate |
| Chamfered or eased edge | Softened, slightly formal | Edges people pass close to; arris protection | Agree the chamfer size with the fabricator |
| Natural cleft margin | Honest and irregular | Rustic formats where the split face carries the design | Expect variation – it is a feature, not a defect |
| Recessed shadow gap | A deliberate dark separation | Transitions to other materials | Coordinate backing, movement allowance and water management behind the gap |
Because a cleft face and a cut edge read as two different surfaces of the same stone, a factory sample showing both together teaches more than any photograph of the panel face. The surface finishes guide covers the face side of that contrast; the edge side is decided here, on the drawing.
5. Stop Four – The Base and the Top of the Wall
Crouch at the base of the wall. No junction on the elevation takes more splash water, impact and ground-level moisture than this one – and the rain tests it every day.
At the bottom of a drained or ventilated cladding assembly, the last slate course terminates against a base flashing or base profile; below it sit the ventilation path and a drip detail, and beyond that a paved or gravel surface that throws splash away from the stone. The slate's job ends at the metal line. What carries water, air and ground moisture behind the cladding is the wall assembly – the same layered story the cladding substrates guide tells from the other side – and on exterior work these details do real duty in a way interior feature walls never face; the exterior versus interior cladding comparison draws that line clearly.
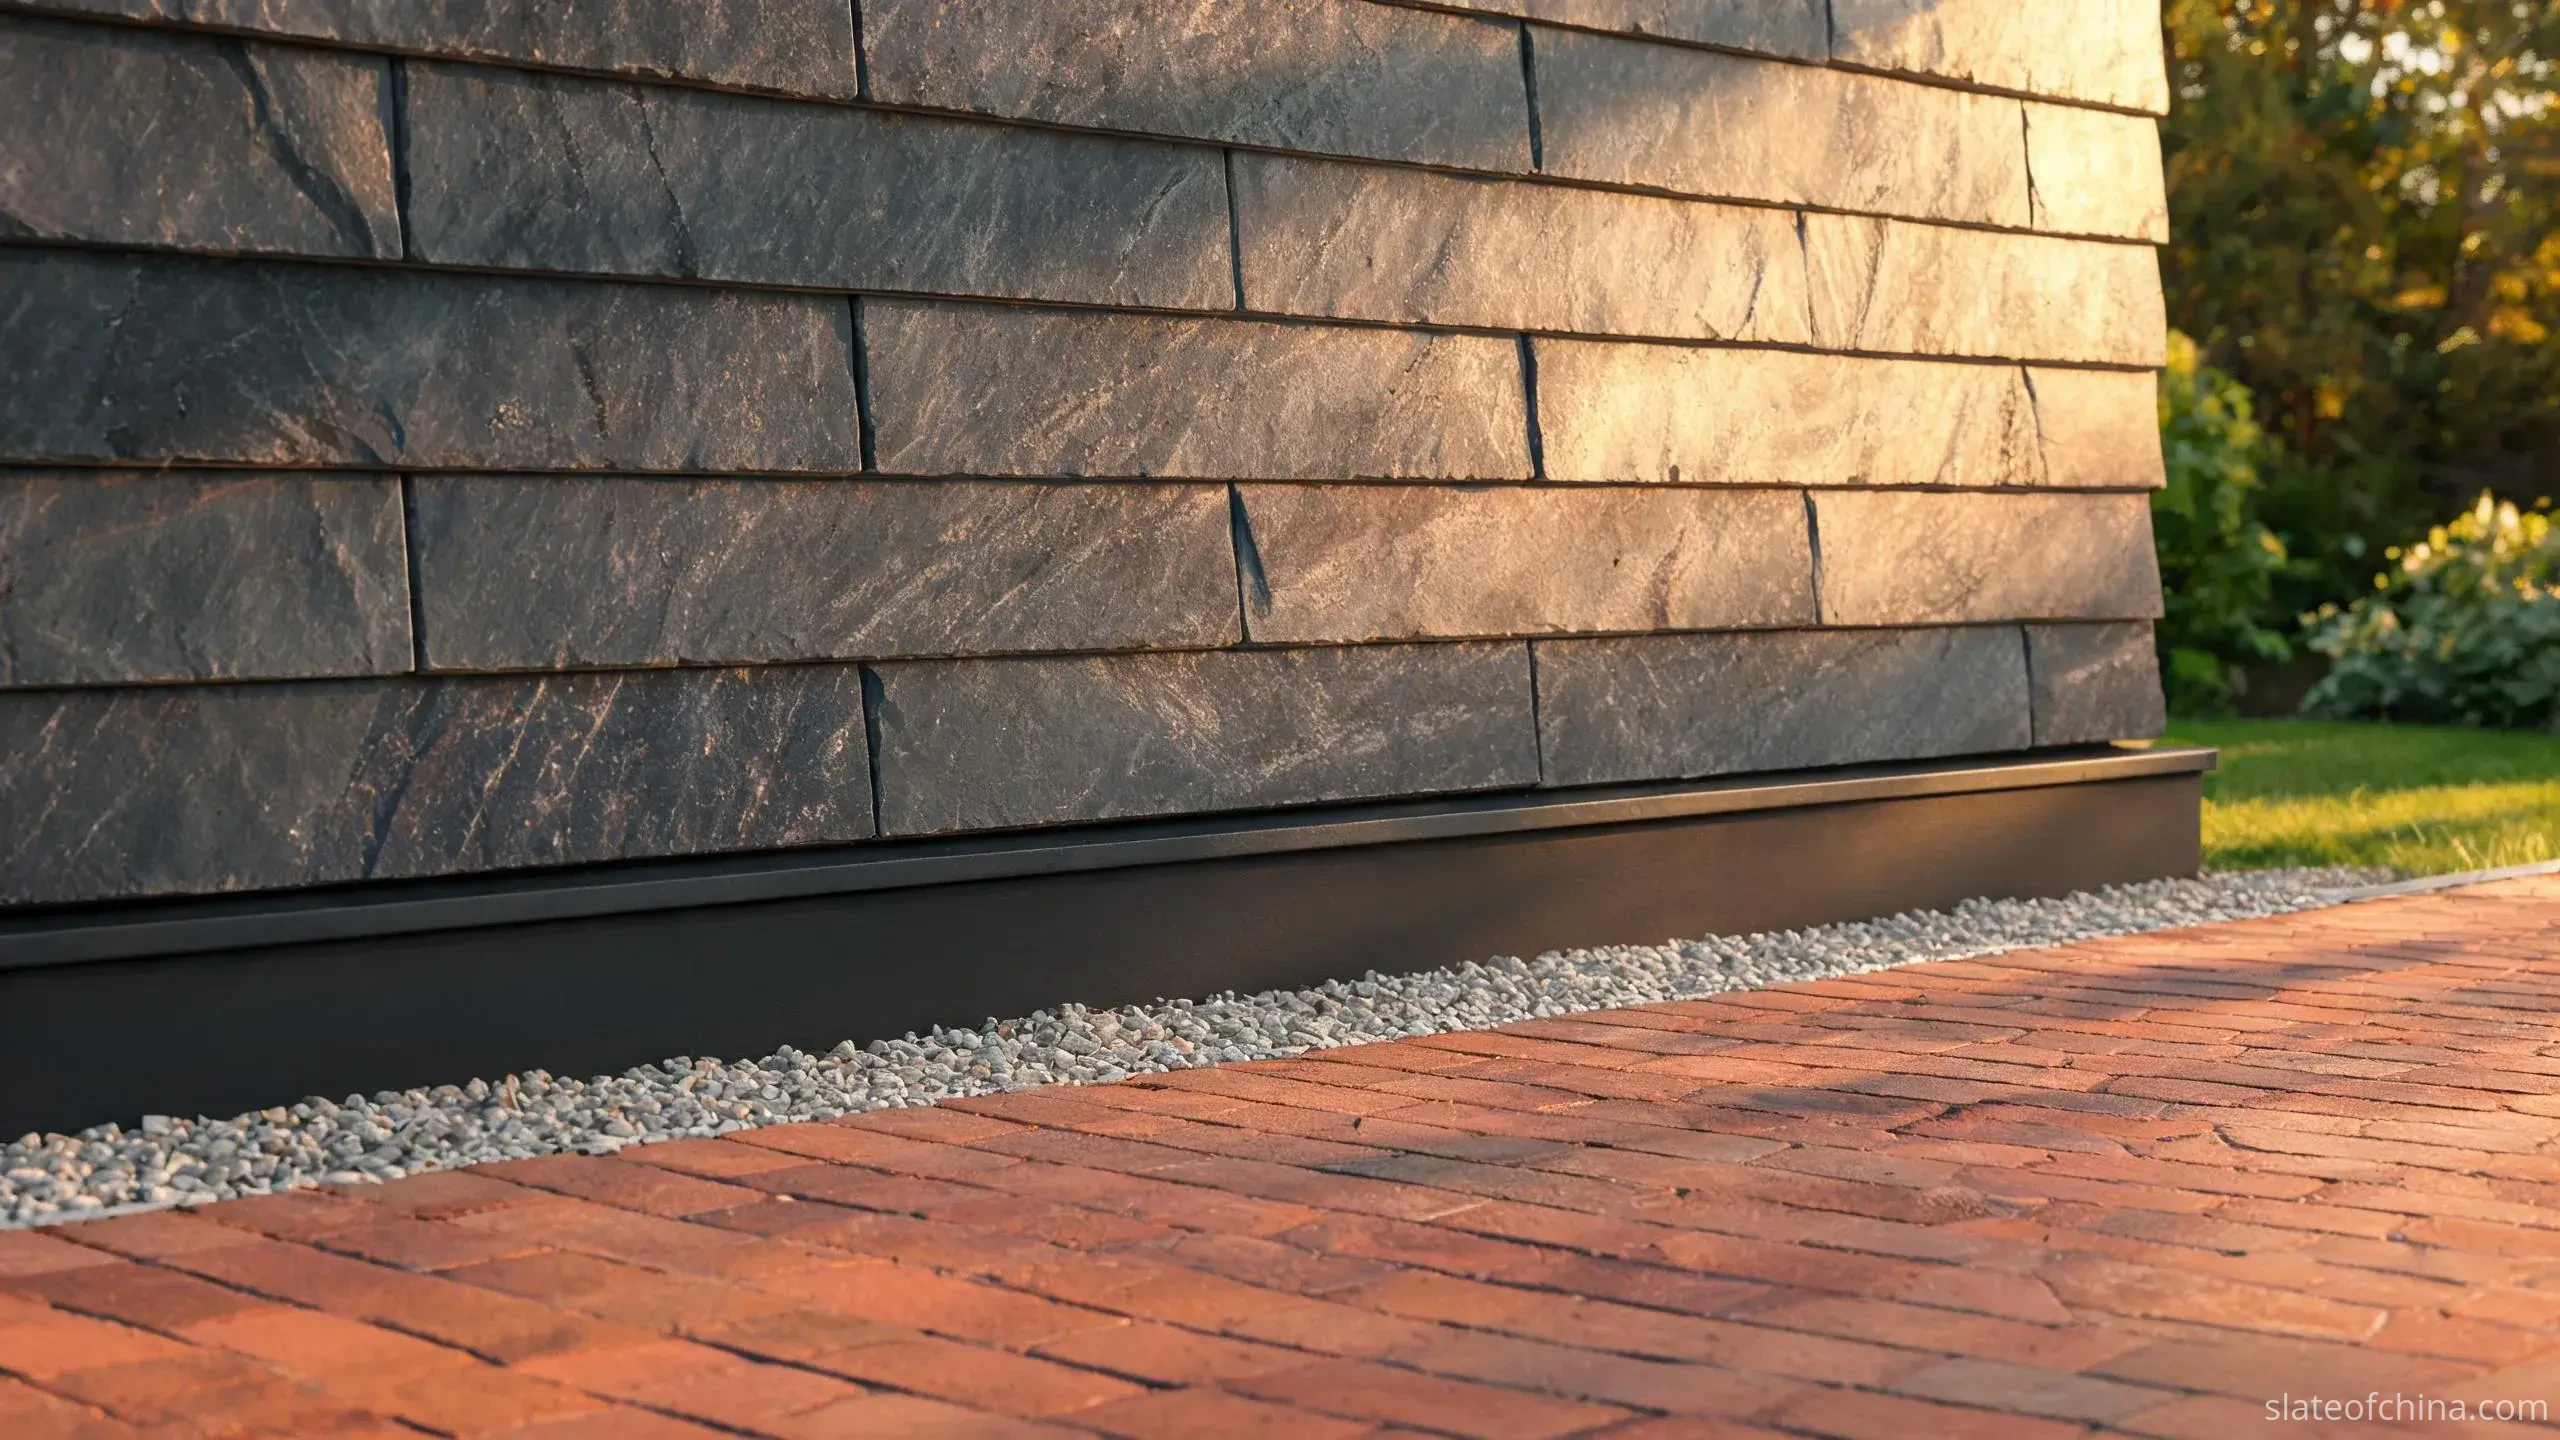
At the top, a parapet is closed by a coping and its flashing – weather protection that a slate panel glued to the vertical face does not replace. And a word that fabricators and engineers will repeat in chorus: movement joints are never deleted to preserve a continuous stone line. Their locations and widths belong to the engineered facade design, and a corner or a parapet is exactly where they usually land.
6. Stop Five – Where Slate Meets Other Materials
The walk ends where the slate meets everything it is not: render, timber, glass, aluminium, brick.
Every change of material is a junction someone had to draw, because the materials disagree – on movement with temperature and moisture, on construction tolerance, on how they age. The joint between them has to absorb those disagreements: a shadow gap where the design wants separation, a sealed and sized joint where the design wants continuity, a profile where one material needs to terminate cleanly against the other.
The failure mode is not mysterious. When no one draws the transition, the installer draws it – with a grinder, at the end of the day, in whatever material is left over. A door frame, a glazing mullion and a rendered band all deserve the same measured-reveal treatment as a window, and each transition belongs on the schedule with its own line.
7. Frequently Asked Questions
Can natural slate cladding have mitred external corners?
Yes, many natural slate cladding panels can be fabricated with mitred edges. Suitability depends on the slate type, panel thickness, edge condition and fixing system. Confirm feasibility with the fabricator and the facade designer before the detail goes onto drawings.
What is the best corner trim for slate wall cladding?
There is no universally best option. A mitred corner suits calibrated panels on quiet contemporary facades; a butt-jointed, expressed-thickness corner suits cleft-textured slate; a metal corner profile gives a controlled line and protects a vulnerable edge. The choice follows the design language, the fixing system and the exposure.
What is the difference between a mitred corner and a corner unit?
A mitred corner joins two flat panels, each cut at an angle, typically 45 degrees on a nominal 90-degree corner. A corner unit is a single L-shaped or return piece that wraps the corner in one stone, avoiding the visible joint. Units consume more material per corner and depend on the format being available in matching stock.
Can slate be used for window reveals?
Yes. Natural slate can line jambs, heads and suitable sills when the return depth, thickness, fixing and edge finishes are designed and the pieces are cut to the measured opening. The weatherproofing of the window-to-wall connection remains a separate, designed part of the system.
How do I measure window openings for slate reveals?
Measure each opening individually on site, at several points, once the frame position is fixed. Record the finished reveal depth from the cladding face back to the frame, not from drawings. Nominal window sizes are a starting point, not an order.
Should slate cladding corner joints be sealed?
Follow the approved system design. Some facades use open joints over a drained and ventilated cavity; others use specified sealed joints. Sealing joints indiscriminately can block drainage or ventilation that the system was designed to rely on.
Can corner pieces be cut on site from spare panels?
Site cutting can serve adjustments, but planned corners should not be improvised this way. A site-cut edge rarely matches the factory finish, and an accurate mitre made without the right equipment wastes more stone than it saves. Order corners as fabricated pieces and hold spares of those exact pieces.
What drawings should I send when ordering slate cladding trim?
Send dimensioned elevations and sections showing the panel layout, corner angles, reveal depths, sill and edge details, visible faces and edges, fixing interfaces and tolerances, ideally as a numbered schedule so each special piece can be referenced and approved before production.
8. The Layout Behind the Details
A convincing junction starts one level earlier, on the elevation drawing – before anyone thinks about a cutting list. The main horizontal courses, the vertical joint positions, the opening locations and the corner arrangement are one pattern, and the pattern is set before the first piece is cut.
Two alignments are common. Continuous alignment runs the horizontal joints straight through corners and reveals wherever the geometry allows – disciplined, architectural, unforgiving. Controlled offset staggers the joints on a repeating rhythm, which suits certain formats – but even then, the narrow slivers that appear beside window frames and at corners have to be planned, because minimum practical piece sizes depend on the stone, the fixing method, hole positions and edge distances, and a layout full of unbuildable slivers is not a layout.
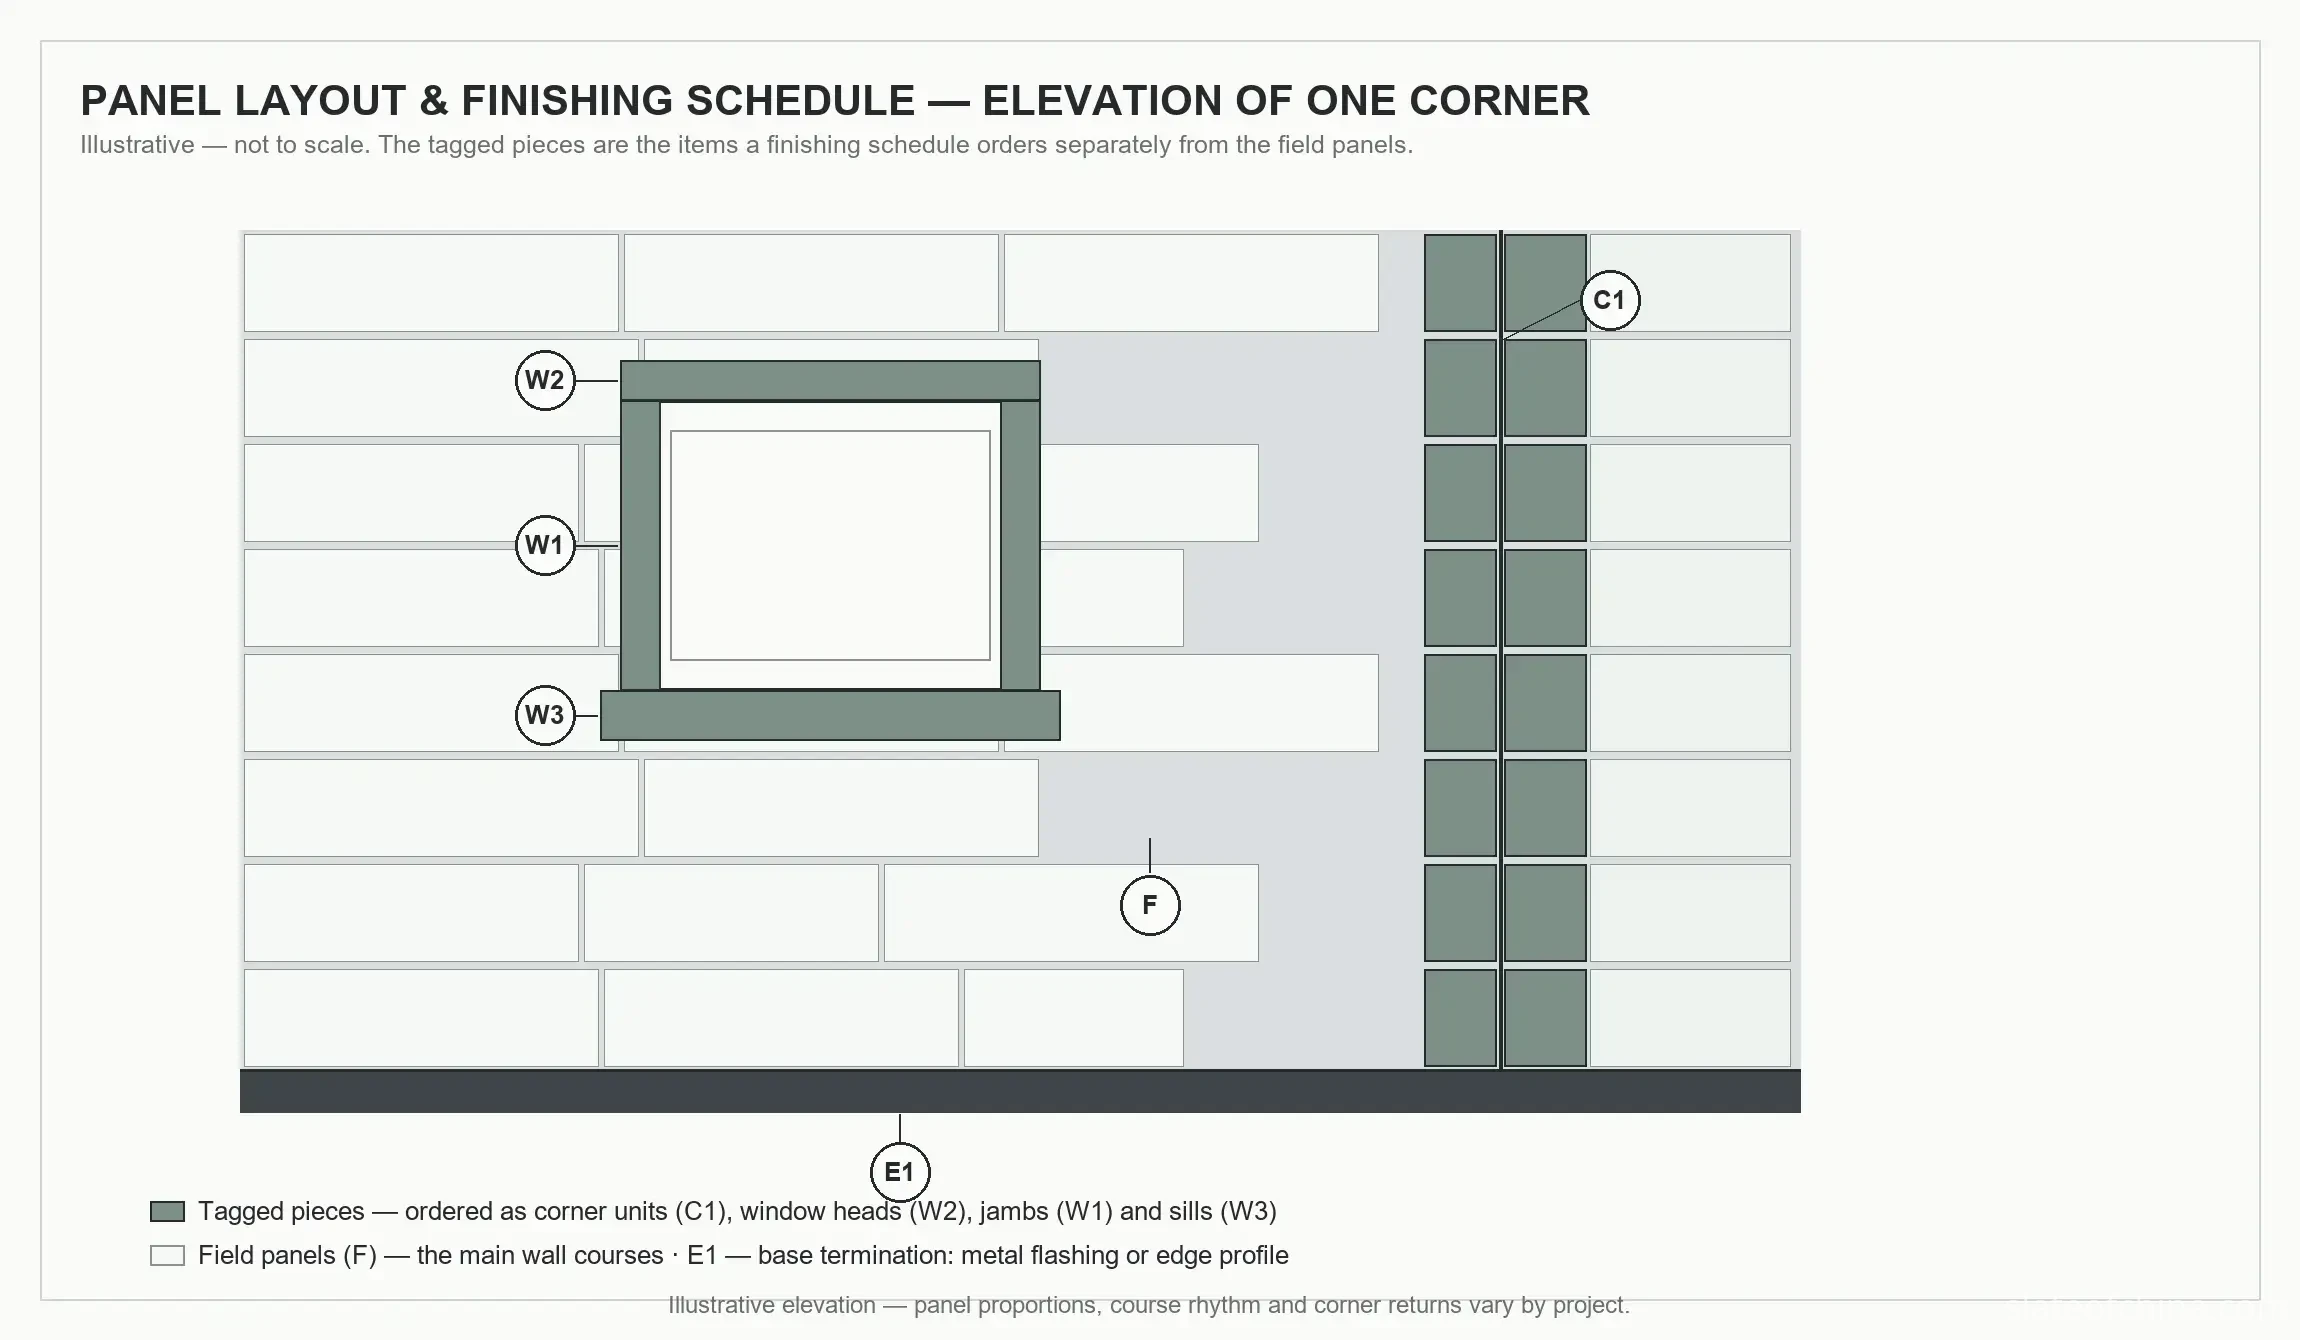
For anything larger than a single elevation, a numbered drawing and a matching schedule close the loop between architect, supplier and installer: every corner unit, jamb, head, sill and special gets a reference, and the reference appears on the packing list. A corner built from offcuts prints a seam line up the building. An elevation drawn corner-first hides its decisions in the pattern.
9. The Finishing Schedule: What Goes on the Order
The walk around the wall ends at the order, which is where what to order, not improvise stops being a slogan. A complete slate cladding order identifies the specials alongside the field panels, line by line:
| Component | What to confirm on the order |
|---|---|
| Main field panels | Format, thickness, surface finish, quantities per the numbered layout |
| External corner pieces | Option (mitred pair, corner unit or profile), measured angles, leg lengths |
| Window jambs | Return depth per opening, piece lengths, exposed edge finish |
| Window heads | Dimensions, edge finish, fixing and flashing interfaces |
| Window sills | Fall, projection, thickness, drip groove and end details |
| Edge termination pieces | Cut sizes, edge treatment, profile compatibility |
| Special cut pieces | Elevation references, angles, cut-outs and holes |
| Spare material | Allowance for breakage, adjustments and future matching, sized per piece |

Three practices separate a smooth project from a frustrating one. One: ask for corner and trim pieces to be crated and marked separately from field panels – the classic site error is a beautiful corner unit quietly consumed as an ordinary panel on day two. Two: order corners, sills and heads from the same batch as the field stone, and price spares when you price the job, because a chipped mitre or a damaged sill edge cannot be patched, and a replacement cut a year later will not match the installed colour range exactly. Three: include the weight of every special piece in the overall cladding-system load calculations. Corner units, thick sills and other fabricated components have to be considered when the supporting brackets and fixings are selected – and the thickness and weight companion guide carries the bands those pieces fall into.
For the panel families these specials are cut to match, the wall cladding slate range groups the formats and finishes currently in supply.
Factory Fabrication: Turning Detail Drawings into Slate Components
Once the finishing details are approved, the drawings still have to become stone. Depending on the slate material, its thickness and the requirements of the detail, producing custom-cut slate panels and their corner, reveal and trim components may involve straight cutting, angled edge cutting, chamfering, drilling and other project-specific processing within the possibilities of slate cladding fabrication.
On a facade with many corners and openings, a numbered cutting schedule is what keeps that work consistent: each corner unit, jamb, head and sill is identified, cut, checked and packed against its reference – the same reason the elevation earlier in this guide carries tags rather than descriptions.
Before a bulk order is committed, confirm with the supplier which fabrication methods are available for the selected material, what dimensional tolerances apply, how edge quality is controlled, and what sample approval is required. Not every slate material or thickness suits every kind of precision fabrication – and a fabricator who answers those questions in writing has effectively joined the specification team.
10. Eight Mistakes Made at the Junctions
The failures here are not exotic. They repeat, project after project, and nearly all of them are procurement mistakes rather than stone mistakes.
| Common mistake | The better approach |
|---|---|
| The corner design is decided after the panels arrive | Approve the corner option before fabrication begins |
| Reveals are ordered from nominal window sizes | Measure each opening and frame position on site |
| Slate joints are assumed to be the waterproof line | Design drainage, flashing and ventilation as the system |
| Sharp mitres are specified on thin, heavily cleft slate | Confirm thickness, edge condition and fixing feasibility first |
| Edge finishes drift across the elevation | Define every visible edge on the cutting drawings |
| Movement joints are deleted to keep stone lines continuous | Locate and size them with the facade designer |
| Mock-ups are skipped on a complex facade | Build and approve a corner-plus-window mock-up first |
| Zero spares are ordered for corners and sills | Include an allowance for exactly the pieces that chip |
The arithmetic is one-directional: careful detailing costs a few days of drawing time. Remaking specials on a finished facade costs stone, freight, crane hire and an argument.
11. The Mock-Up Corner: Approve It Once
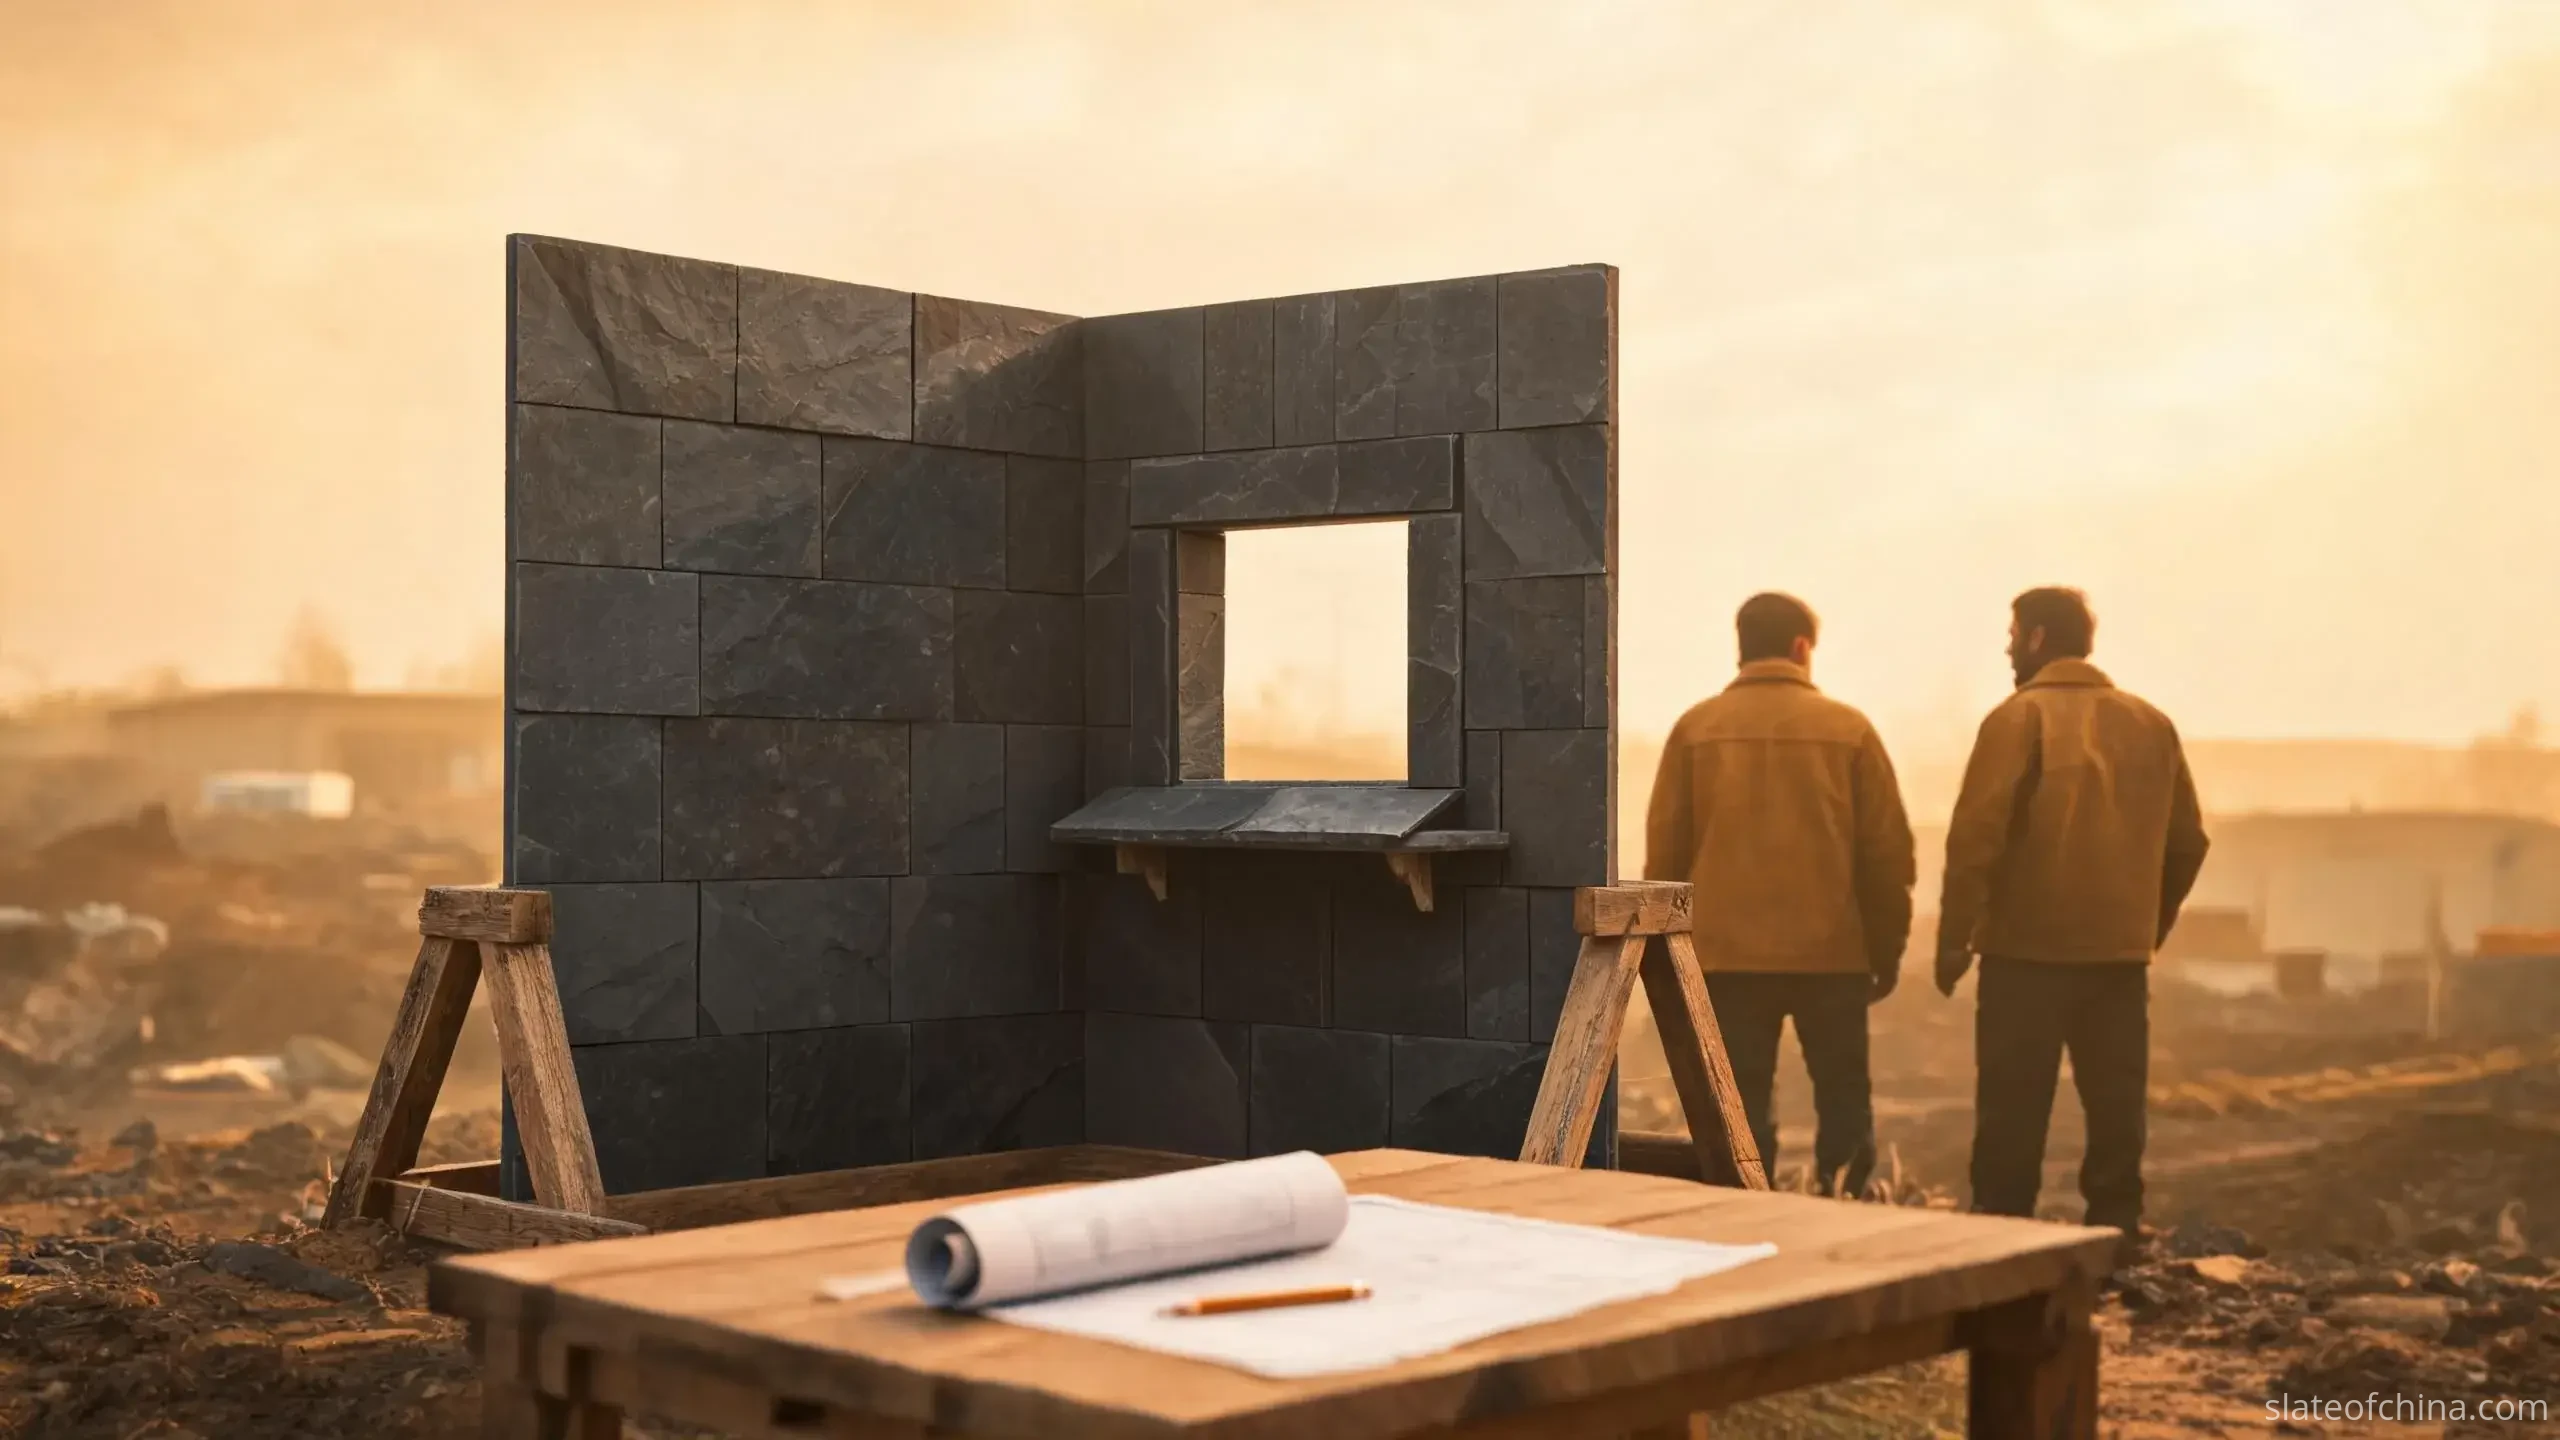
Junctions sit at the intersection of four responsibilities, which is why they fall between them when nobody coordinates. The architect owns the appearance and the visible junction logic. The facade designer or engineer owns performance, the supporting construction and the approved fixing system. The stone supplier owns material availability, fabrication, tolerances and edge finishes. The installer owns site conditions and the built result.
On anything unfamiliar – a new slate, a complex profile, a demanding joint pattern – a full-size mock-up of a typical corner and window opening is worth far more than its cost. It answers, at once, the questions that otherwise surface one elevation at a time: the real colour range across the batch, how the cut edges read against the faces, whether the chosen joint widths survive assembly, whether the flashing interfaces close, and whether the crews can actually build the detail as drawn. Approve the mock-up, photograph it, and let it referee every later disagreement.
12. Final Thoughts: A Wall Reads Finished at Its Junctions
Natural slate brings texture, depth and endurance to a facade – and then hands the verdict to its smallest details. The slate cladding corners, the window reveals, the exposed edges, the base and the transitions are where the eye goes, where the water goes, and where the money goes if they were left to chance.
The walk in this guide is the walk a client takes, whether they know it or not. The schedule at the end of it is how a design survives contact with the site: corners ordered as corners, reveals measured and cut per opening, edges defined on drawings, spares in the crate. Order the details, and the panels finish the story on their own.
Related Reading
Ordering slate cladding corners and trim?
Slate of China works with international buyers on natural slate cladding projects – field panels, corner units, window reveals, sills and edge trims moving to one project schedule. Share your panel dimensions and thickness, the chosen corner detail, window schedule or drawings, quantities and destination port, and we can review formats, fabrication options and packing for quotation and coordination.
Final dimensions, fixings, flashings and structural performance are verified by the responsible project professionals. Contact Slate of China about your slate cladding details